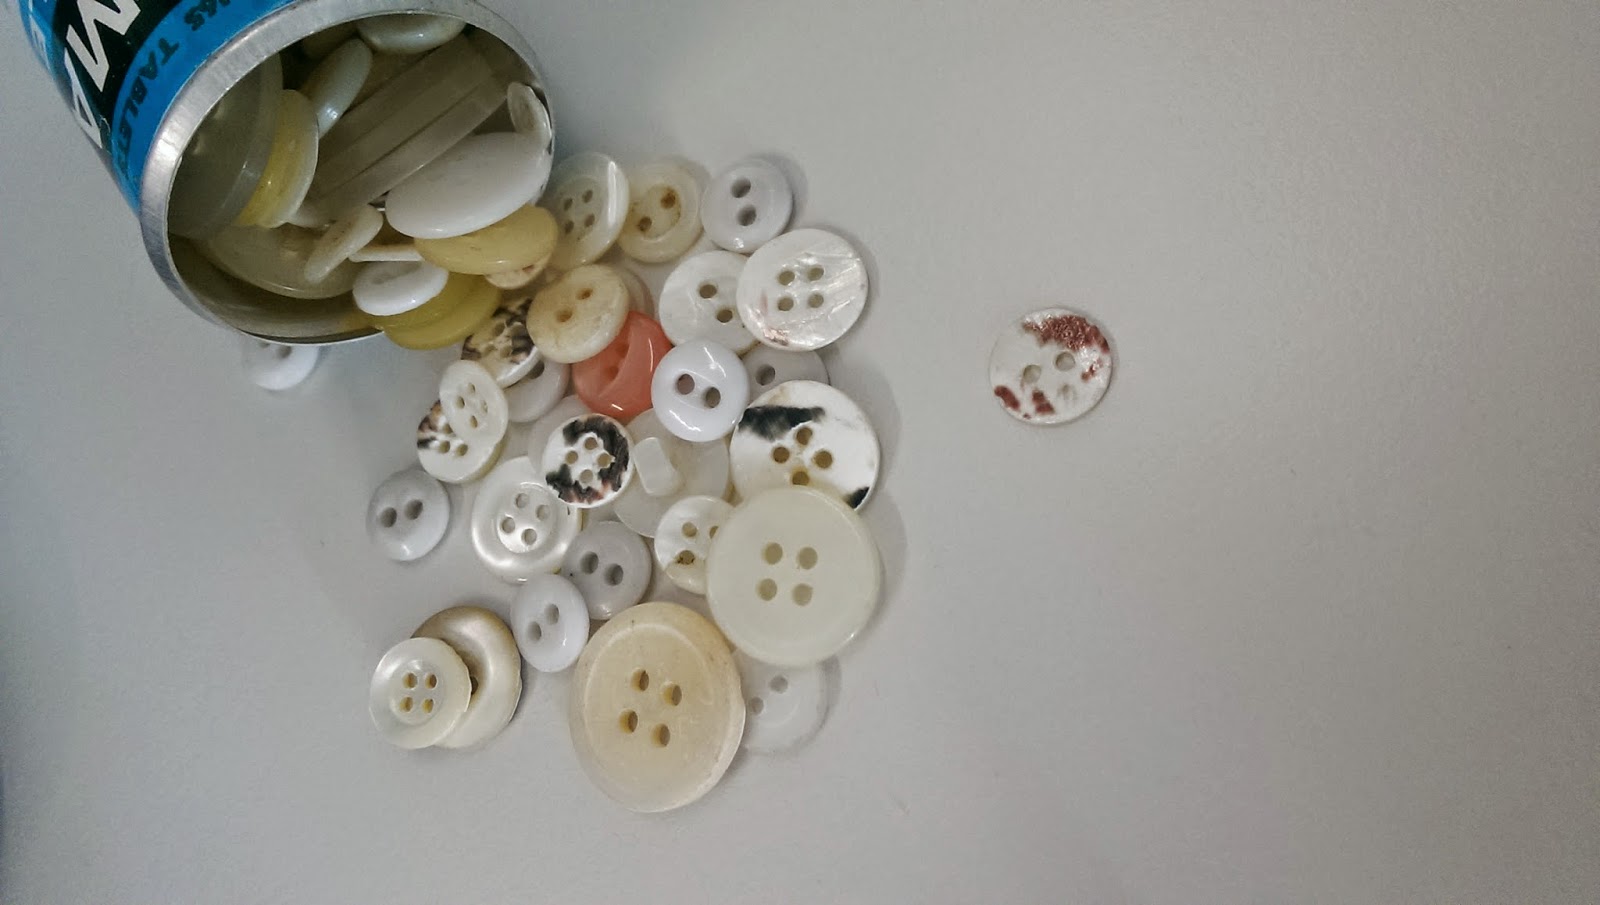
Just a quick post from me today to share with you all some lovely buttons I received in a gift this past weekend :-)
The buttons are mostly mother of pearl and belonged to my great grandmother. Before my grandad was born in 1931 she was a seamstress by trade - her specific job was to join the top and bottom part of socks together. While this career ended when she married and had her family she continued to sew and provide an alteration service for others. Clearly not all of these buttons are from the same era - the pink
button is clearly from a later point in time and most likely dates from
the early 60's however a great number were and still have that lovely shine which the mother of pearl provides :-).
When she died my grandmother salvaged most of her buttons however never found the right project to use them on. Skip forward a number of years and she decided that I could probably put them to use. I hope to find a special project to use these for as it would be such a shame to waste them after all this time! Finally I was rather impressed by the writing on the old indigestion tablet container in which most of these buttons came:
Hope you are all enjoying your week - we actually have great weather right now in glasgow - it's just a shame we're stuck in such a dull office! I hope to have some photos taken in the sun later so I can share my most recent project
Jennifer xx
I have a passion for sewing and a dislike of the throwaway culture which we live in today. This blog documents my fashioning of a complete new wardrobe to reflect me and my tastes.
Wednesday, 22 April 2015
Friday, 17 April 2015
Me Made May 2015
I have signed up to the challenge:
'I, Jennifer Shaw of Jennifer's Sewing Space, sign up as a participant of Me-Made-May '15. I endeavour to wear at least one me made garment each day for the duration of May 2015'
I'm excited! I didn't feel ready to participate last year for a number of reasons however this year I think that I have enough me-made garments to make an interesting challenge (and that are of an acceptable quality to wear.)
Particular events which make this an interesting challenge are that we are away on holiday at the end of the month: to Ireland. However more specifically to a festival. Right now I don't really have any festival gear and it was number 4 on my 2015 sewing plan. So I think I'll be doing a touch of research into the ins and outs of no-camping-required festivals. This festival plus associated holiday takes up a full week in May and I'm excited :-D I also have an adult job now - and whereas there are no hard and fast rules on uniform - I feel more inclined to wear something more formal than my usual crazy print fit and flare style that I seem to have adopted!
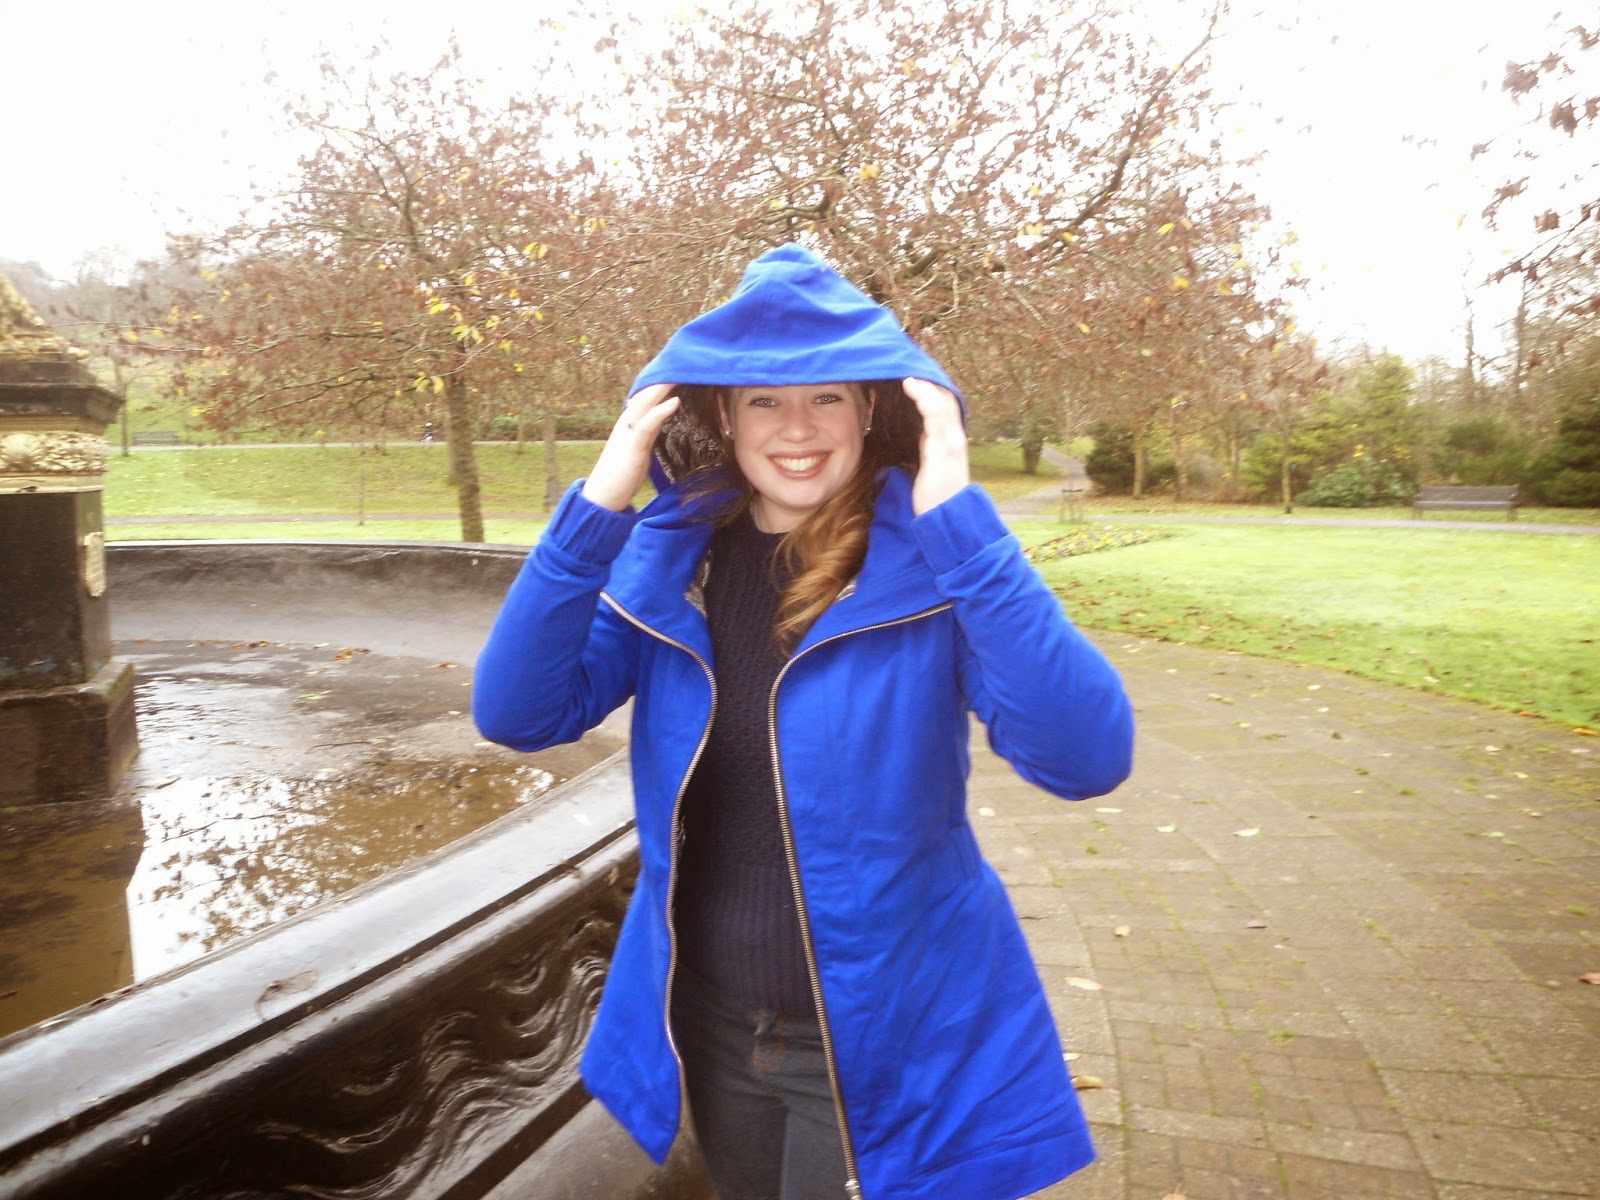
Items in my handmade wardrobe which currently see a lot of wear include my trusty minoru jacket:
I think this goes with about 90 % of my wardrobe. I'm still working on starting my plan for a spring jacket - however as spring has only really just arrived I don't feel so bad. I have my pattern and fabric ready I just need to make one alteration to the front jacket piece then it's all good to go.
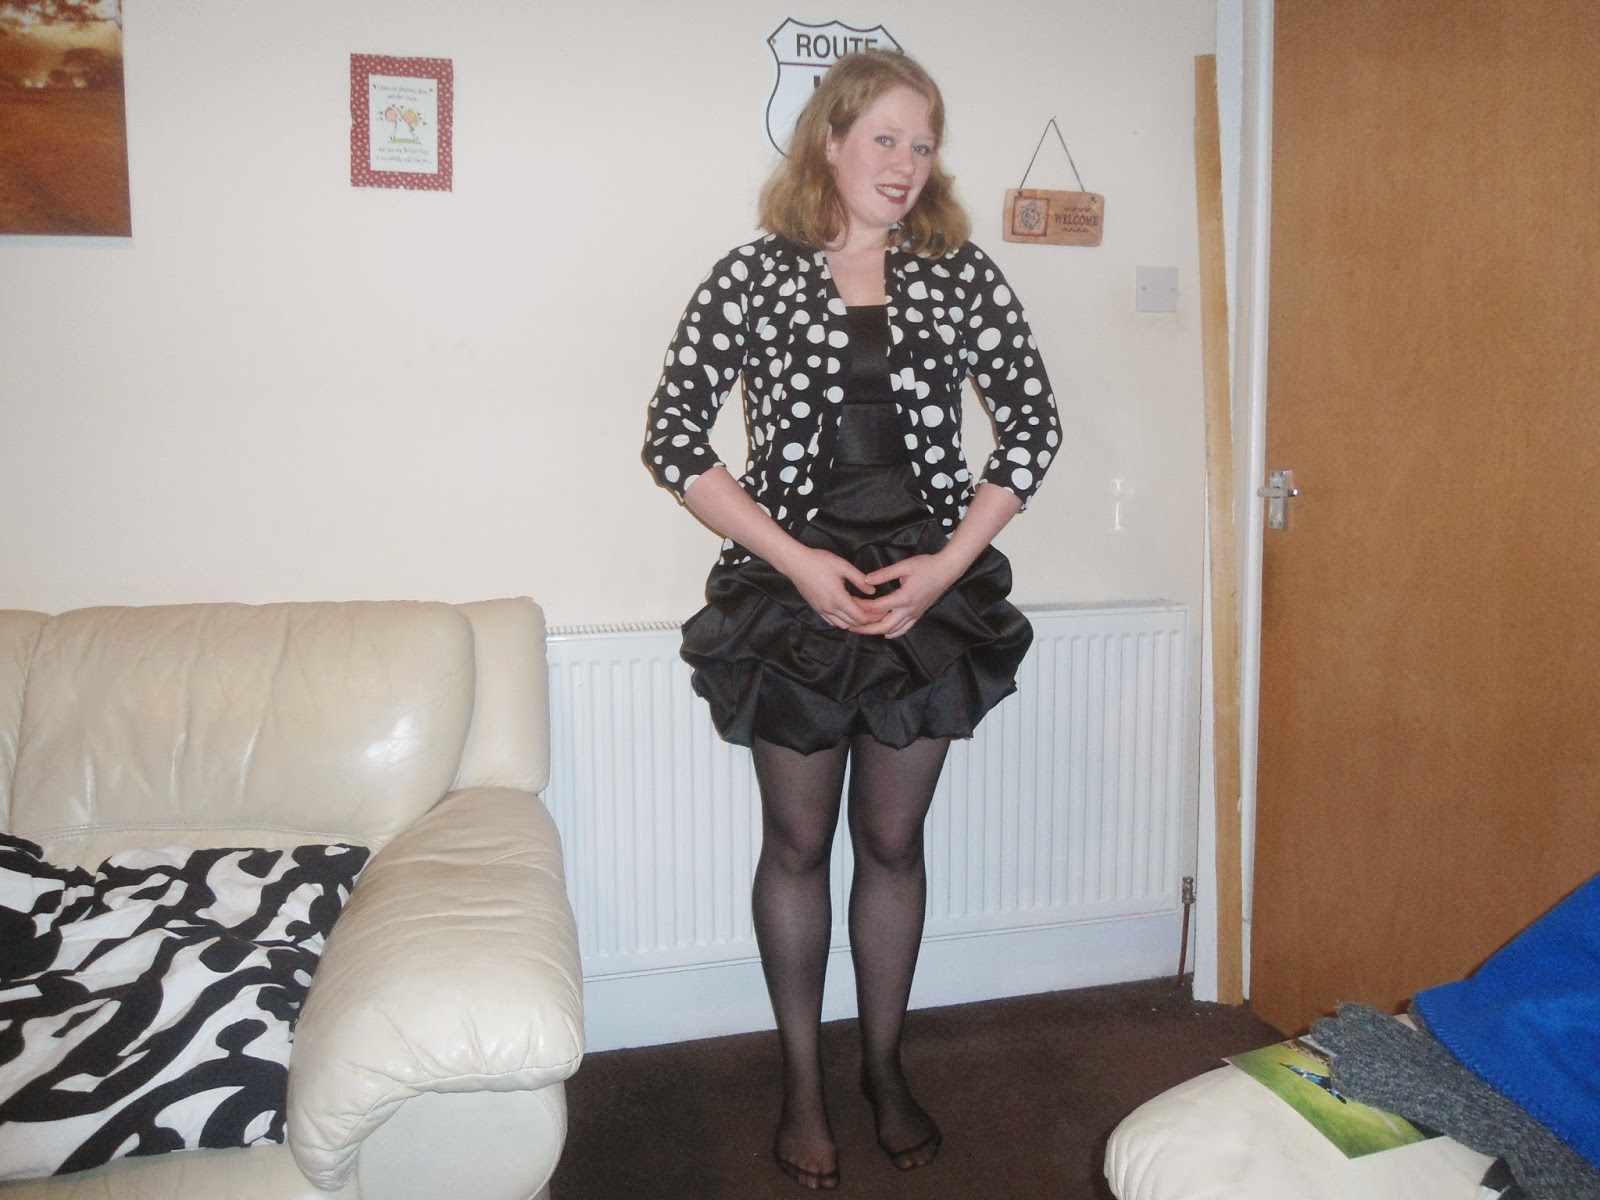
another item which has found it's way into immediate rotation is my Julia Cardigan:
Clearly I don't wear it with a party dress every day however it goes with, again, 90 % of my wardrobe and definitely fits the work appropriate criteria that I'm looking to build!
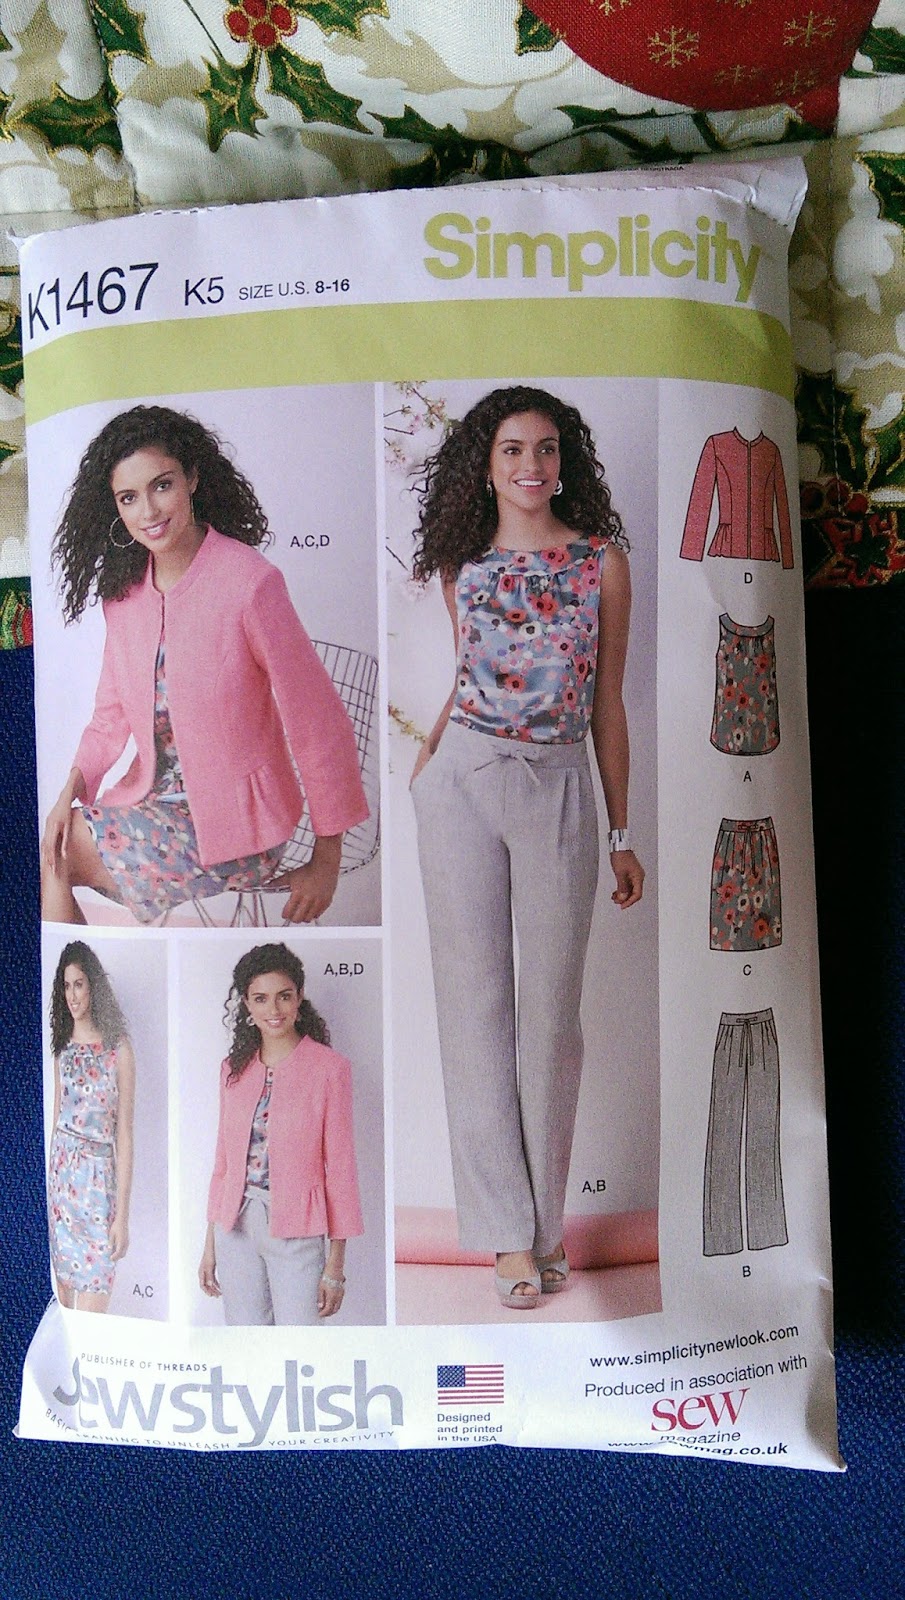
There are also a few items which I hope to finish up before the end of the first week of May - just to give me more choice. Two of these are cut and ready to sew, I have two patterns ready to cut the fabric from. One of the patterns that I'm hoping to have a bash at (and is the one I have traced pieces for) is this simplicity 1467. I got this free with a sewing magazine this month and think that this pattern alone could fill a few of my pre-May gaps.
Have a great weekend everyone, this week has been insanely busy with work for me yet I find myself enjoying what i do more now than since I worked in the shop/warehouse until 2009. Thats not to say I haven't enjoyed my studies until now - just that I prefer this :-) - so I shall celebrate 6 pm tonight with a large glass of red wine!! Has anyone else signed up for me made may 2015?
Jennifer xx
'I, Jennifer Shaw of Jennifer's Sewing Space, sign up as a participant of Me-Made-May '15. I endeavour to wear at least one me made garment each day for the duration of May 2015'
I'm excited! I didn't feel ready to participate last year for a number of reasons however this year I think that I have enough me-made garments to make an interesting challenge (and that are of an acceptable quality to wear.)
Particular events which make this an interesting challenge are that we are away on holiday at the end of the month: to Ireland. However more specifically to a festival. Right now I don't really have any festival gear and it was number 4 on my 2015 sewing plan. So I think I'll be doing a touch of research into the ins and outs of no-camping-required festivals. This festival plus associated holiday takes up a full week in May and I'm excited :-D I also have an adult job now - and whereas there are no hard and fast rules on uniform - I feel more inclined to wear something more formal than my usual crazy print fit and flare style that I seem to have adopted!
Items in my handmade wardrobe which currently see a lot of wear include my trusty minoru jacket:
I think this goes with about 90 % of my wardrobe. I'm still working on starting my plan for a spring jacket - however as spring has only really just arrived I don't feel so bad. I have my pattern and fabric ready I just need to make one alteration to the front jacket piece then it's all good to go.
another item which has found it's way into immediate rotation is my Julia Cardigan:
Clearly I don't wear it with a party dress every day however it goes with, again, 90 % of my wardrobe and definitely fits the work appropriate criteria that I'm looking to build!
There are also a few items which I hope to finish up before the end of the first week of May - just to give me more choice. Two of these are cut and ready to sew, I have two patterns ready to cut the fabric from. One of the patterns that I'm hoping to have a bash at (and is the one I have traced pieces for) is this simplicity 1467. I got this free with a sewing magazine this month and think that this pattern alone could fill a few of my pre-May gaps.
Have a great weekend everyone, this week has been insanely busy with work for me yet I find myself enjoying what i do more now than since I worked in the shop/warehouse until 2009. Thats not to say I haven't enjoyed my studies until now - just that I prefer this :-) - so I shall celebrate 6 pm tonight with a large glass of red wine!! Has anyone else signed up for me made may 2015?
Jennifer xx
Labels:
#mmmay15,
me made may,
me made may 2015,
Sewing with a plan
Thursday, 9 April 2015
Completed: New Look 6020
Hola!
After declaring that I had not much time for sewing, my production seemed to take an upturn! This dress came together relatively quickly once I had a spare few hours to actually sew it! I even managed to get my overlocker overlocking properly again - somehow the left needle thread had worked its way out of the tension disks :-s. oh well sorted it now is :-)
So with both of my machines fully working, making up this dress from scratch was actually a fairly painless experience :-D. Fairly. I want to make a dress for my cousins wedding at the end of June and have decided to use this pattern and make the necessary changes over a number of wearable muslins before making up the final version in some lovely red crepe I bought in Edinburgh fabrics. I'll share each iteration as I learn to get a perfect fit on this one.
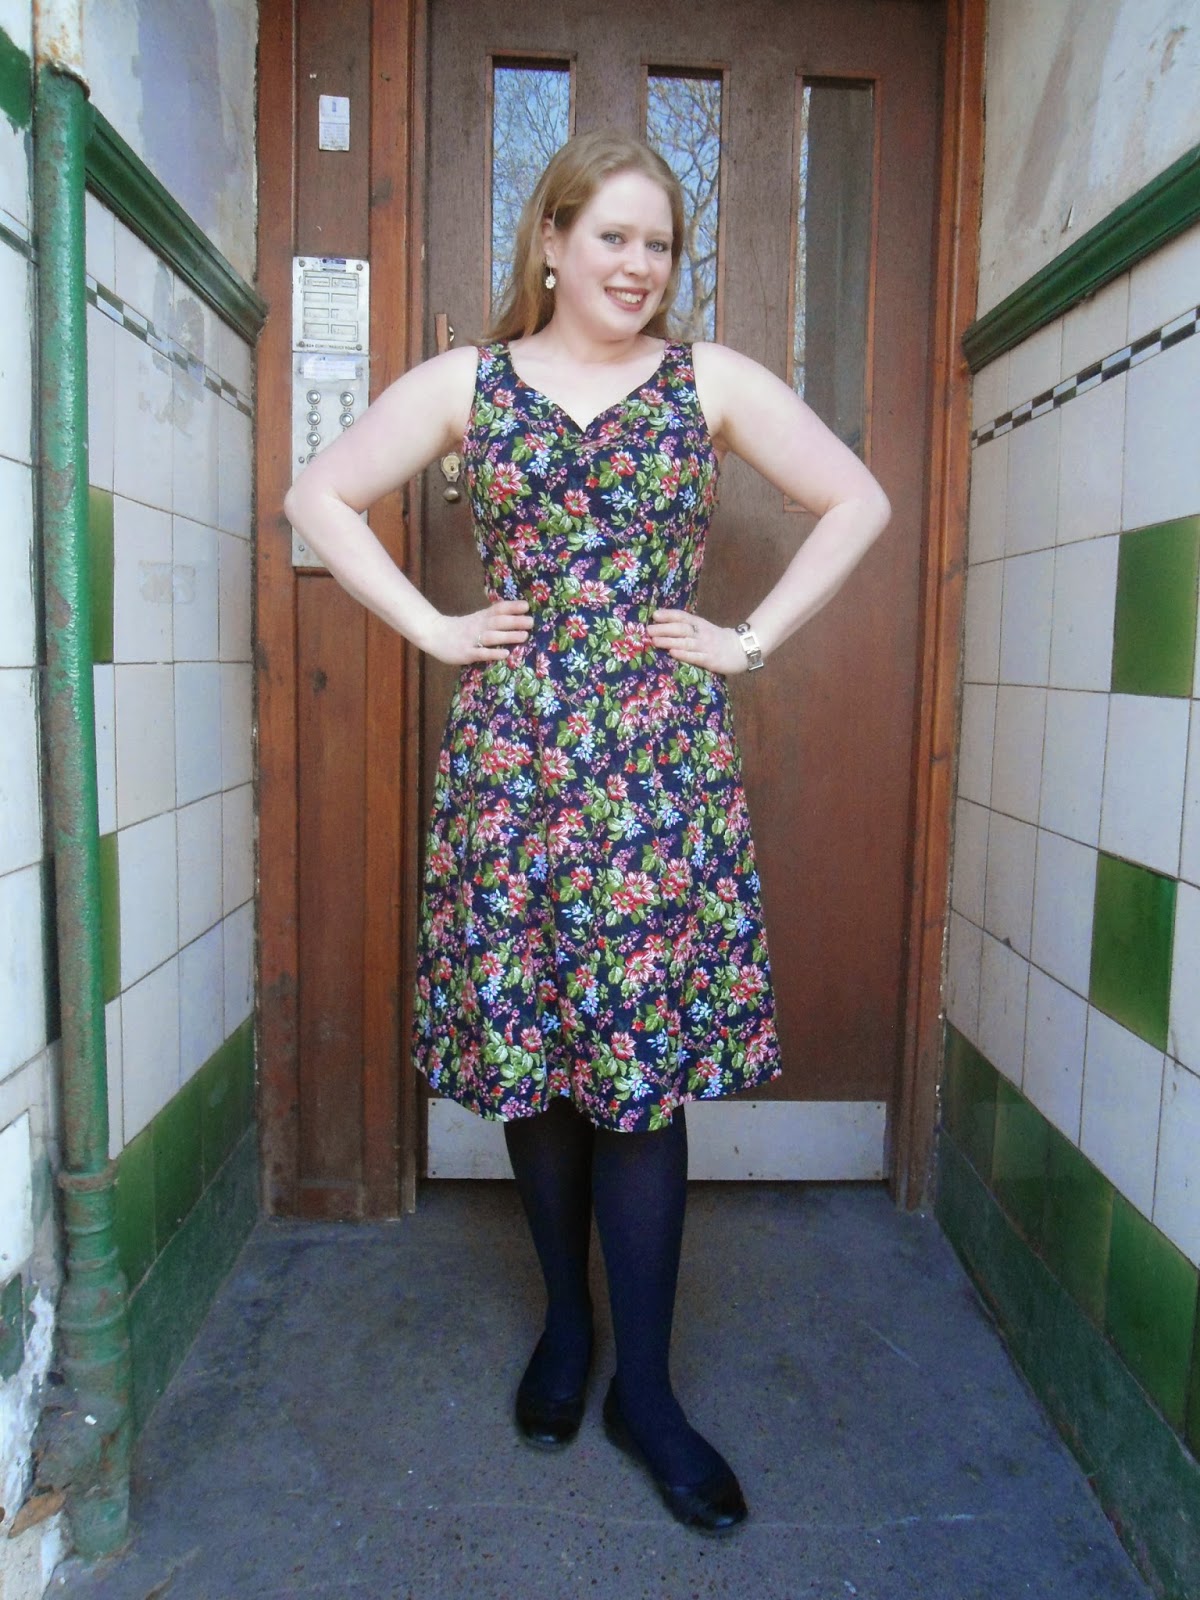
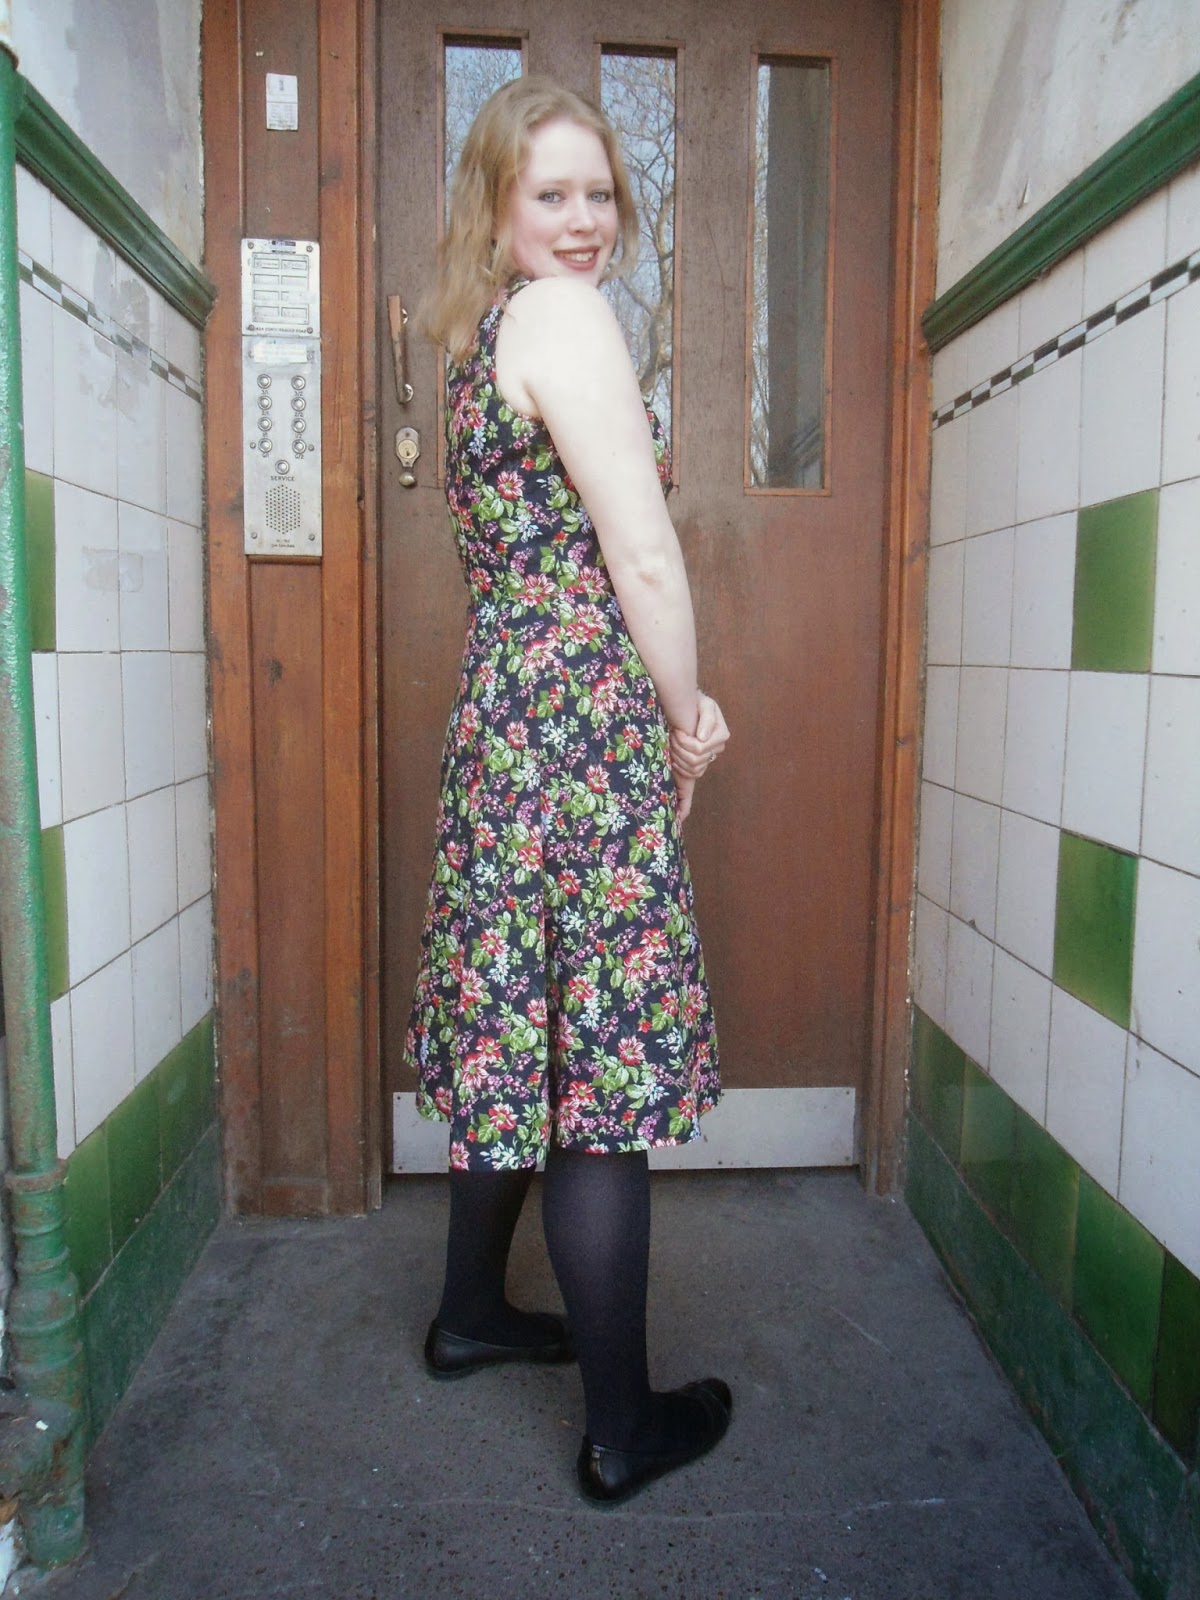
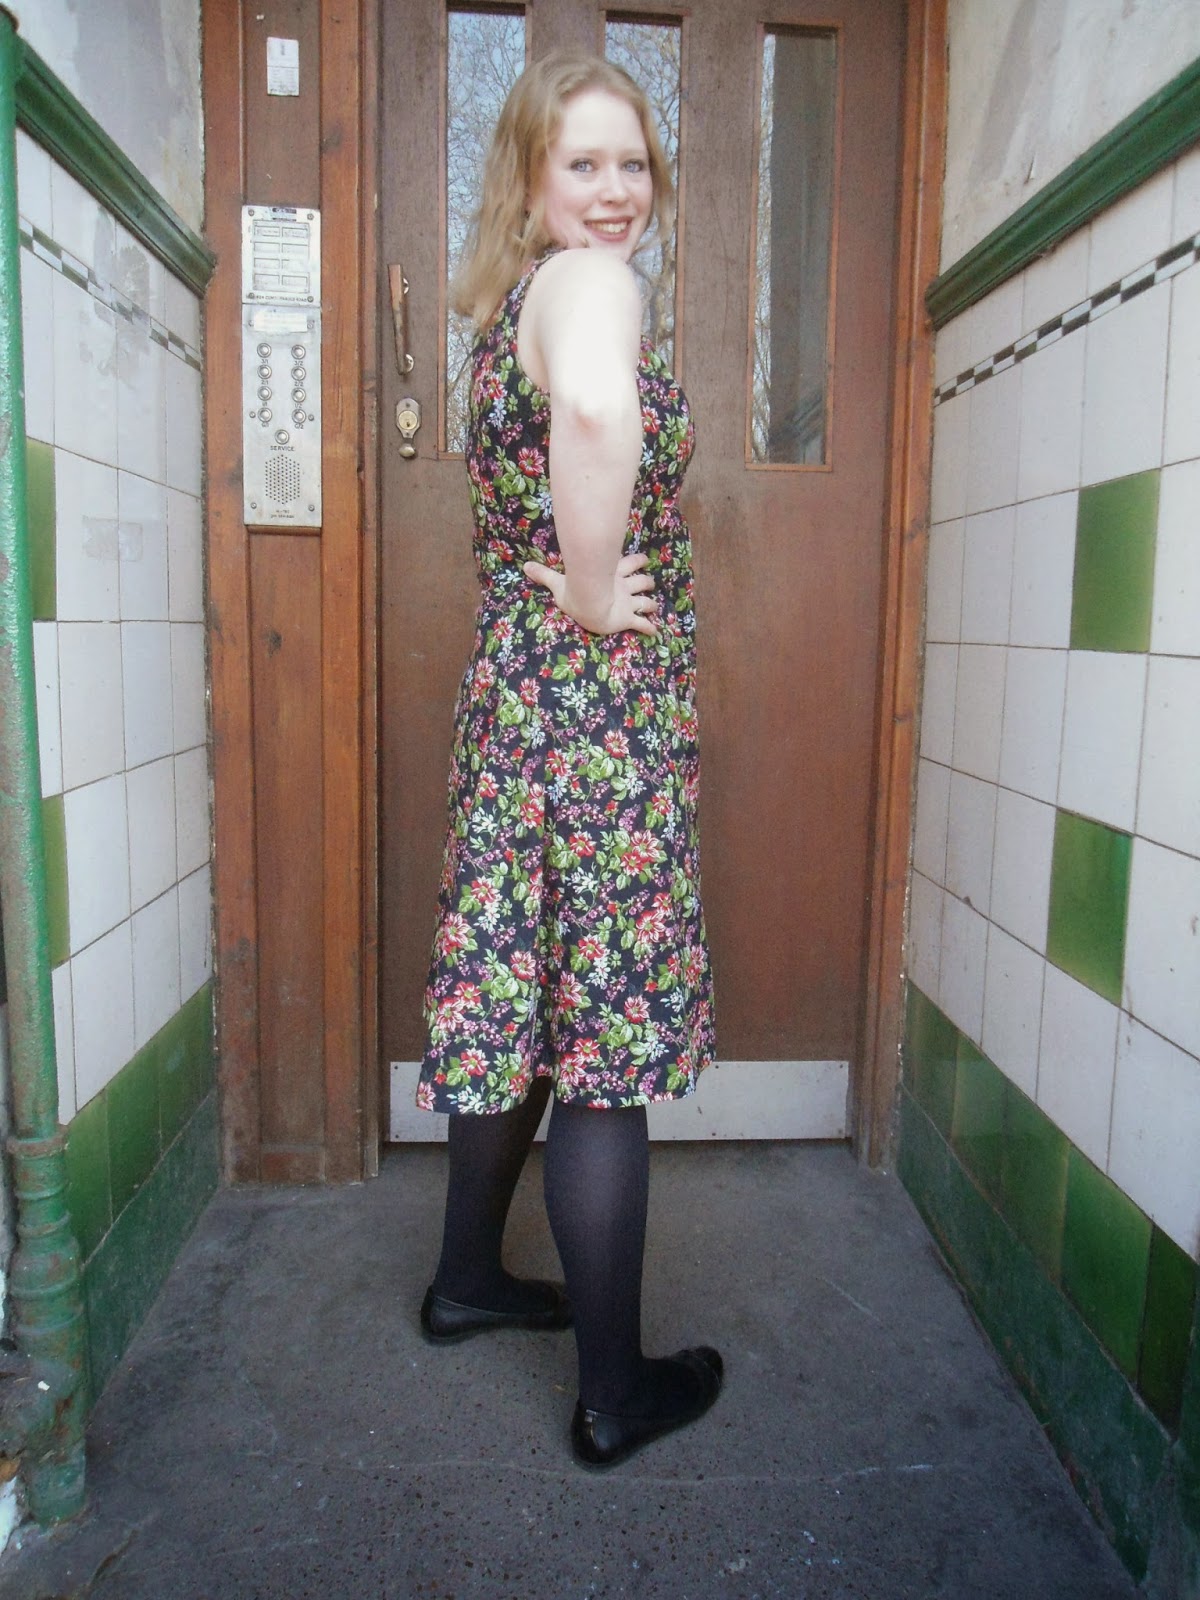
The fabric was a 45" wide cotton from Mandors. I realised at the last minute that I didn't actually have any fabric that was appropriate for a first run of the dress so spent ages lurking all the new bolts which have recently appeared. I felt the flowers on this print stood out more than a regular floral.
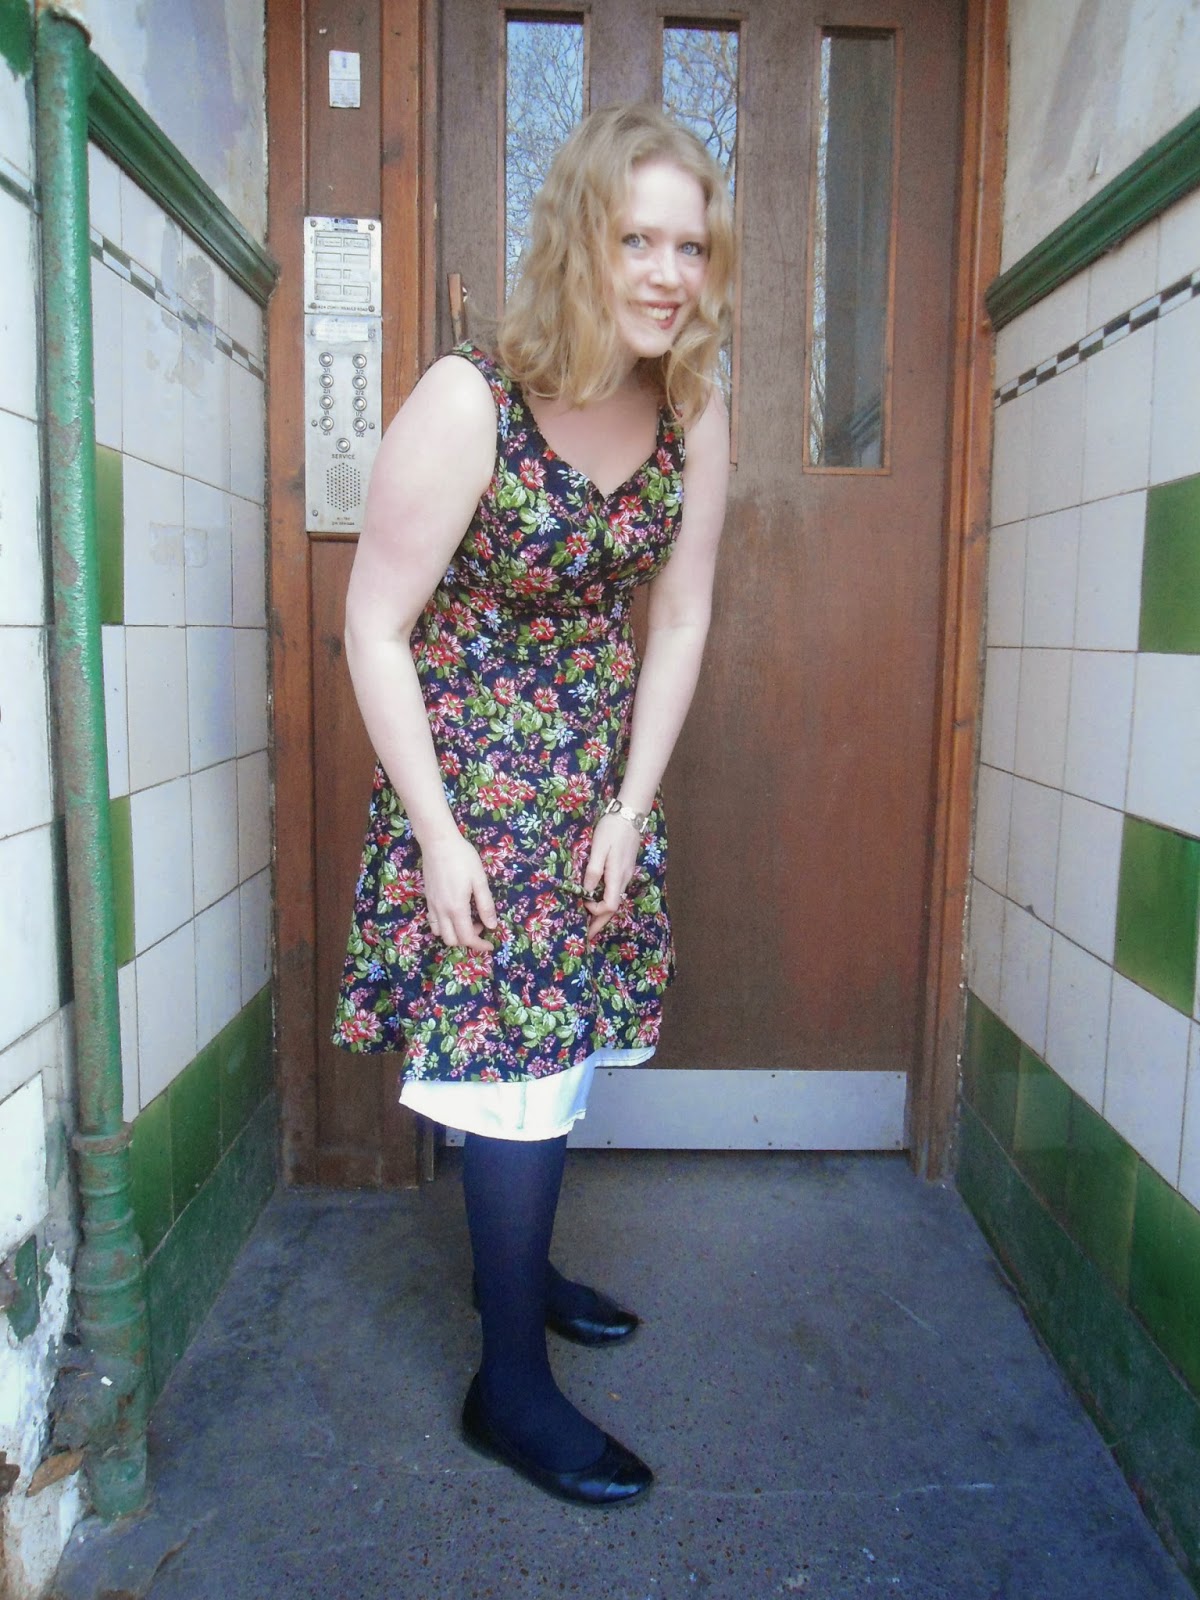
This pattern called for facings and as I really dislike facings I decided that I would try and fully line this dress - skirt and all.
For this I just made up two identical dresses. I had to think a bit about the construction order a little but it went together OK. I attached both dresses at the zip and then pressed the other armhole and neckline under by 5/8" and top stitched. Not the neatest finishing ever but the print hides it a bit. Next time round I am going to finish the armholes with a bias binding facing - much less lazy and a far better finish. I might actually just finish this version with a binding. Maybe. I altered the other half's jeans the other night and it wasn't actually all that bad...
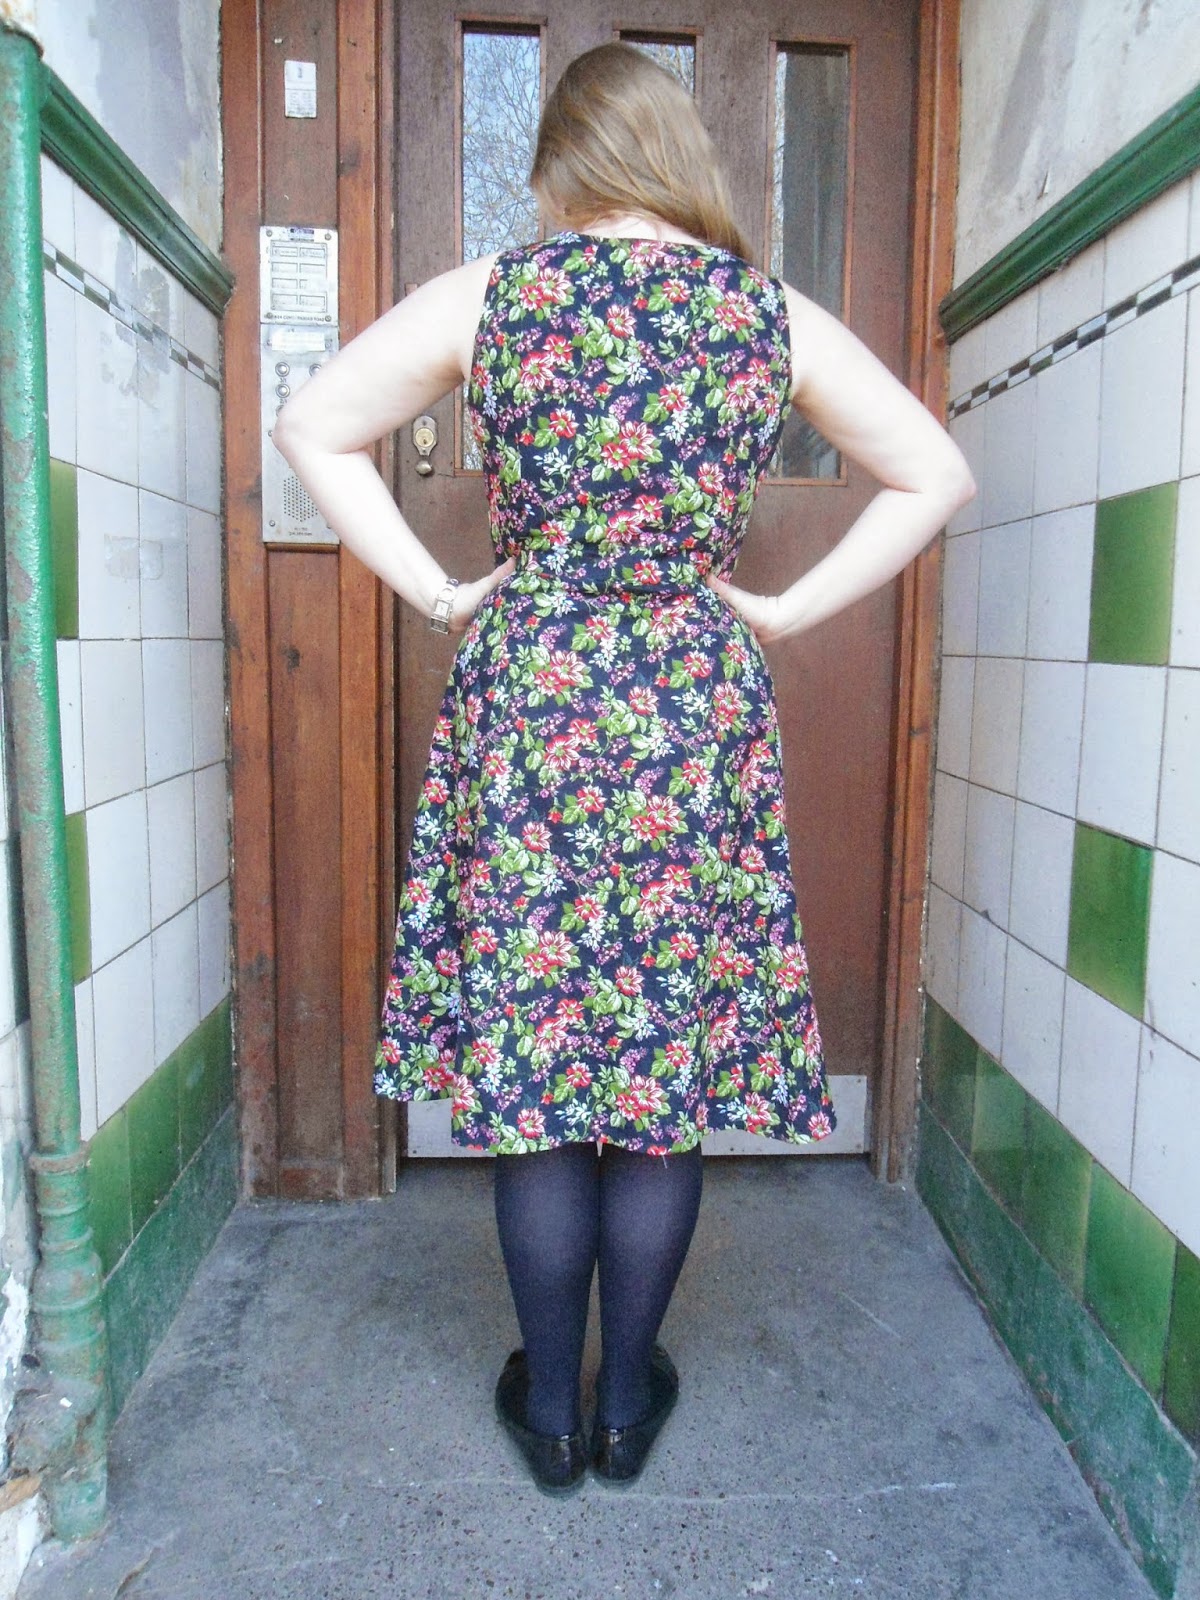
I ended up with a fair amount of gape all around the neckline - I think this is something to do with both my requirement for a narrow shoulder adjustment and the fact it may have stretched while under construction as well as I get the inkling that I cut the size too big. (oh well that's why I didn't cut straight into my crepe....) So in the back I added two darts - which turned out a little too narrow and took out 3/4" length out of the shoulders; on the front I am debating some front darts. I have already taken a wedge out the back paper pattern piece for my next run. Finally I removed quarter of an inch from the back length with another quarter inch marked onto the pattern pieces for next time.
One thing that I liked about the dress is it is more like a tea dress than other styles I have tried. This dress sits under my knee and it took a while but I think i'm used to it! I'm kind of feeling the length right now however will no doubt loose some of it for version 2. Or lengthen it the jury is out on full length, I do love a maxi however the wedding is in the South of England....
I also wore this as my birthday dress the other week (imperfections and all and as a result I'm almost set on trying the size down) - so that is item #2 off my 2015 plan scored off! yay!
Hope your all sewing up a storm :-)
Jen xx
After declaring that I had not much time for sewing, my production seemed to take an upturn! This dress came together relatively quickly once I had a spare few hours to actually sew it! I even managed to get my overlocker overlocking properly again - somehow the left needle thread had worked its way out of the tension disks :-s. oh well sorted it now is :-)
So with both of my machines fully working, making up this dress from scratch was actually a fairly painless experience :-D. Fairly. I want to make a dress for my cousins wedding at the end of June and have decided to use this pattern and make the necessary changes over a number of wearable muslins before making up the final version in some lovely red crepe I bought in Edinburgh fabrics. I'll share each iteration as I learn to get a perfect fit on this one.
The fabric was a 45" wide cotton from Mandors. I realised at the last minute that I didn't actually have any fabric that was appropriate for a first run of the dress so spent ages lurking all the new bolts which have recently appeared. I felt the flowers on this print stood out more than a regular floral.
This pattern called for facings and as I really dislike facings I decided that I would try and fully line this dress - skirt and all.
| Partial fail on the white lining here... |
I ended up with a fair amount of gape all around the neckline - I think this is something to do with both my requirement for a narrow shoulder adjustment and the fact it may have stretched while under construction as well as I get the inkling that I cut the size too big. (oh well that's why I didn't cut straight into my crepe....) So in the back I added two darts - which turned out a little too narrow and took out 3/4" length out of the shoulders; on the front I am debating some front darts. I have already taken a wedge out the back paper pattern piece for my next run. Finally I removed quarter of an inch from the back length with another quarter inch marked onto the pattern pieces for next time.
| I had no idea how to expression an extreme close up... |
One thing that I liked about the dress is it is more like a tea dress than other styles I have tried. This dress sits under my knee and it took a while but I think i'm used to it! I'm kind of feeling the length right now however will no doubt loose some of it for version 2. Or lengthen it the jury is out on full length, I do love a maxi however the wedding is in the South of England....
I also wore this as my birthday dress the other week (imperfections and all and as a result I'm almost set on trying the size down) - so that is item #2 off my 2015 plan scored off! yay!
Hope your all sewing up a storm :-)
Jen xx
Labels:
2015,
2015 makes,
complete,
dressmaking,
New Look,
New Look 6020,
sewing
Location:
Glasgow, Glasgow City, UK
Tuesday, 31 March 2015
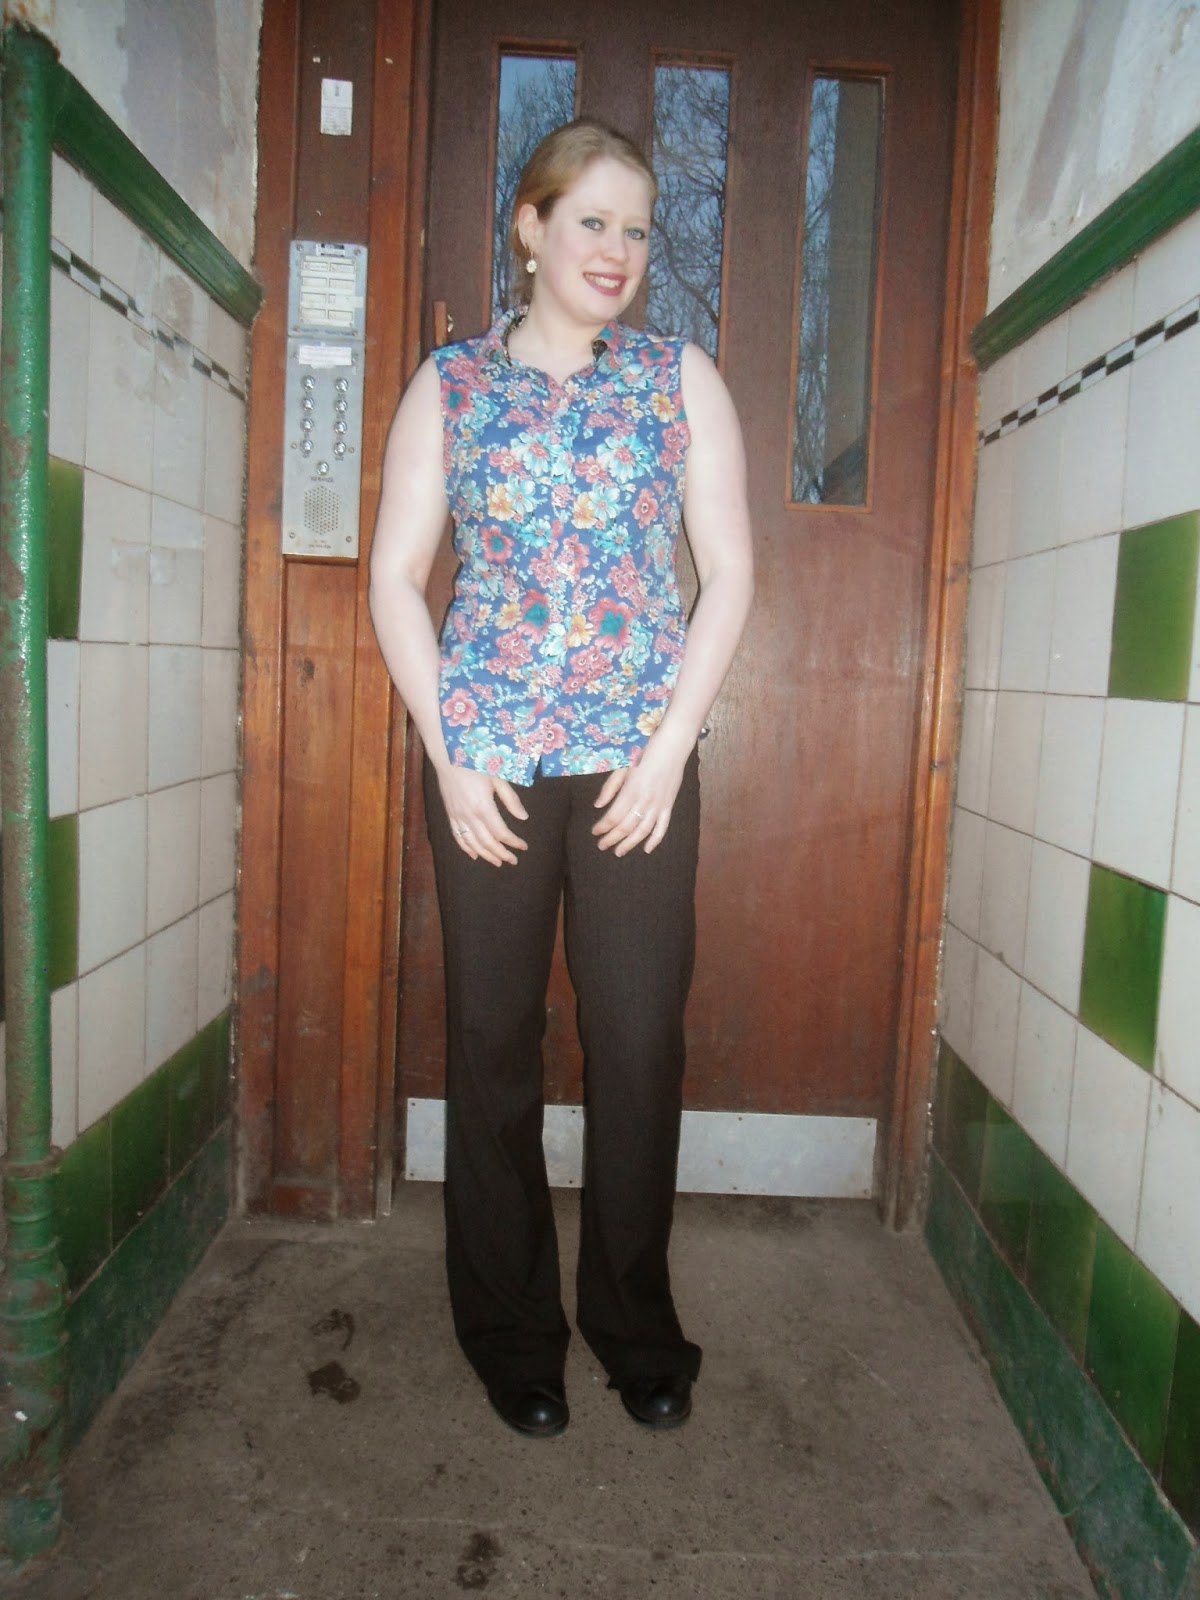
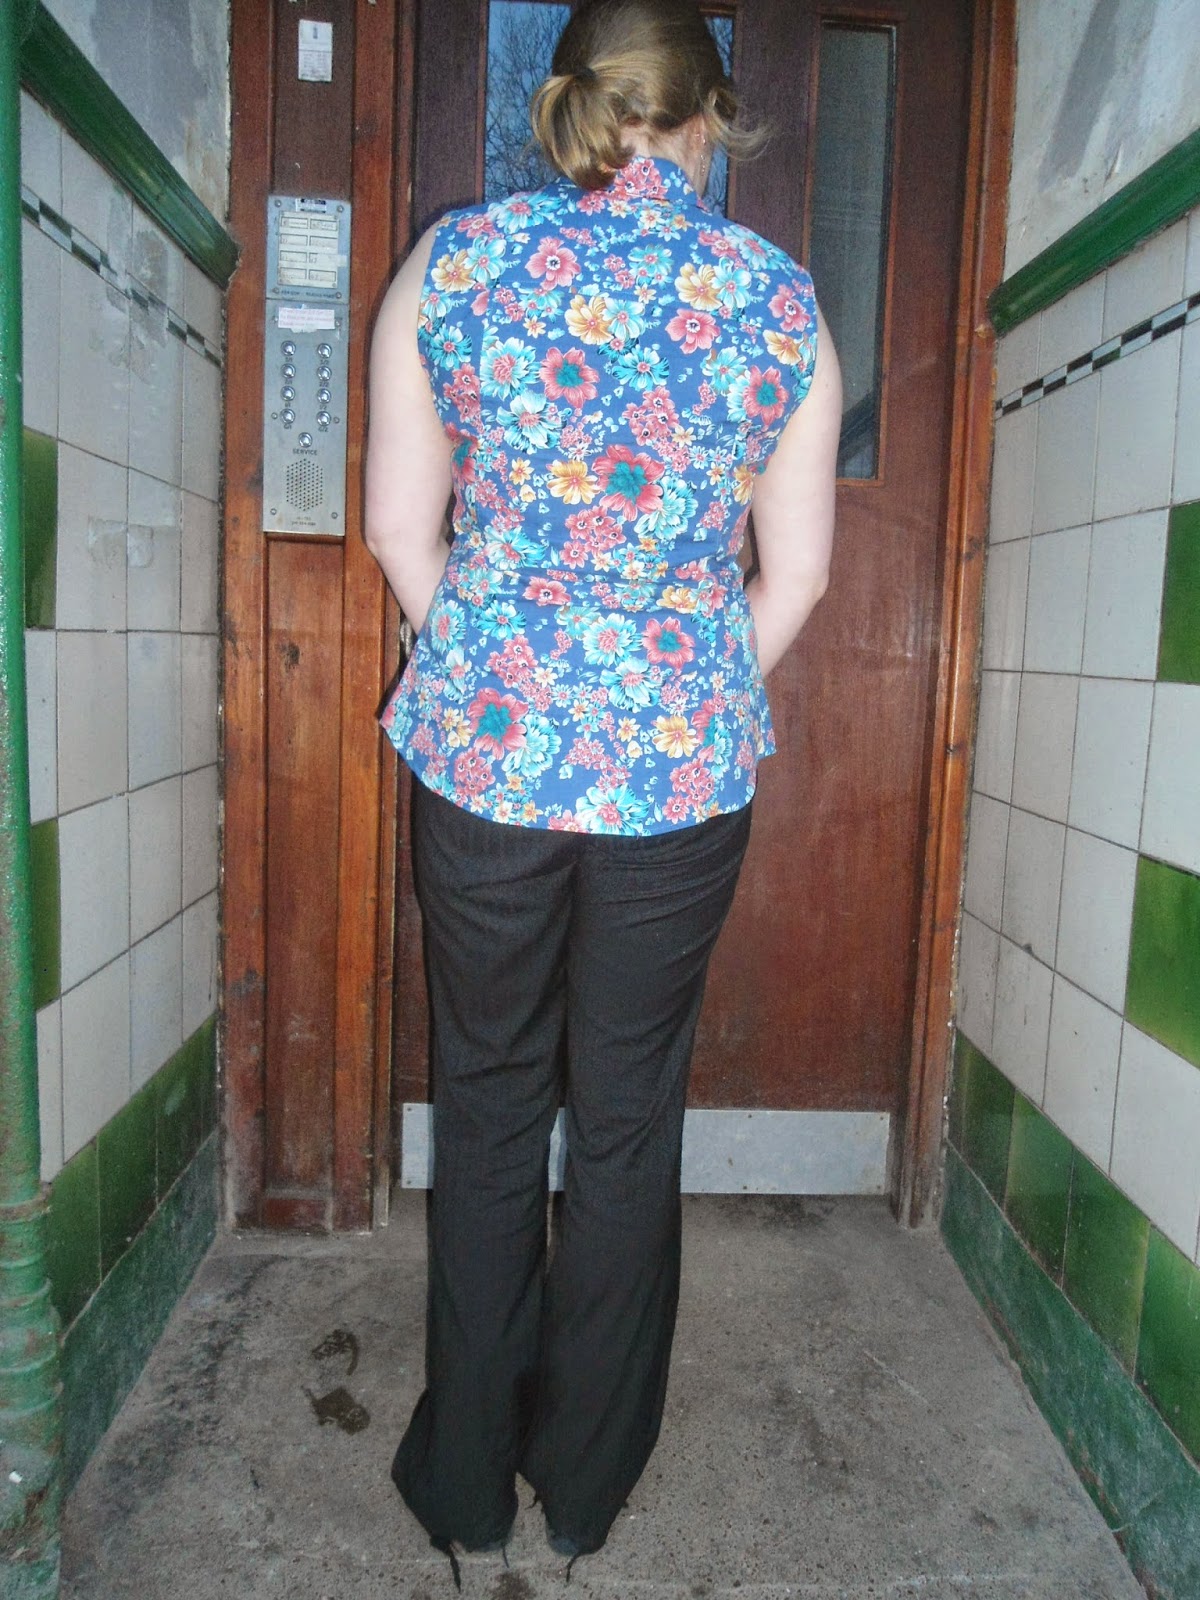
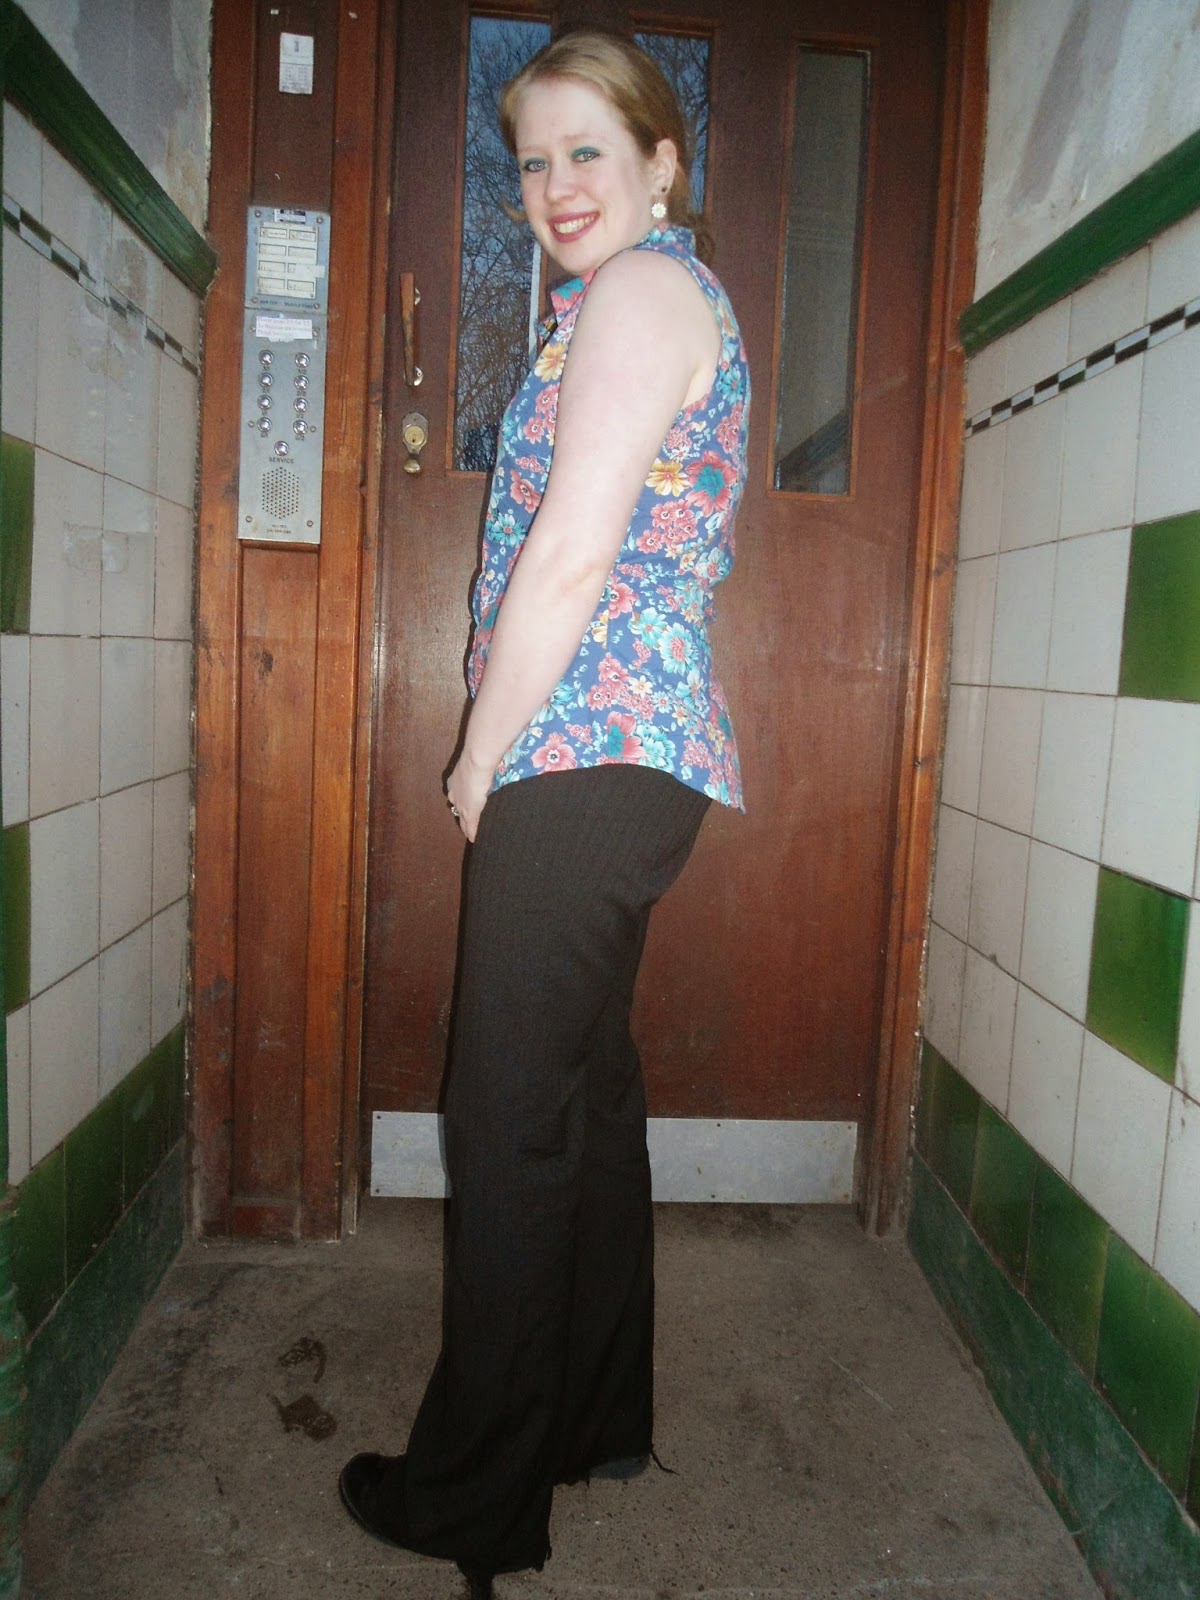
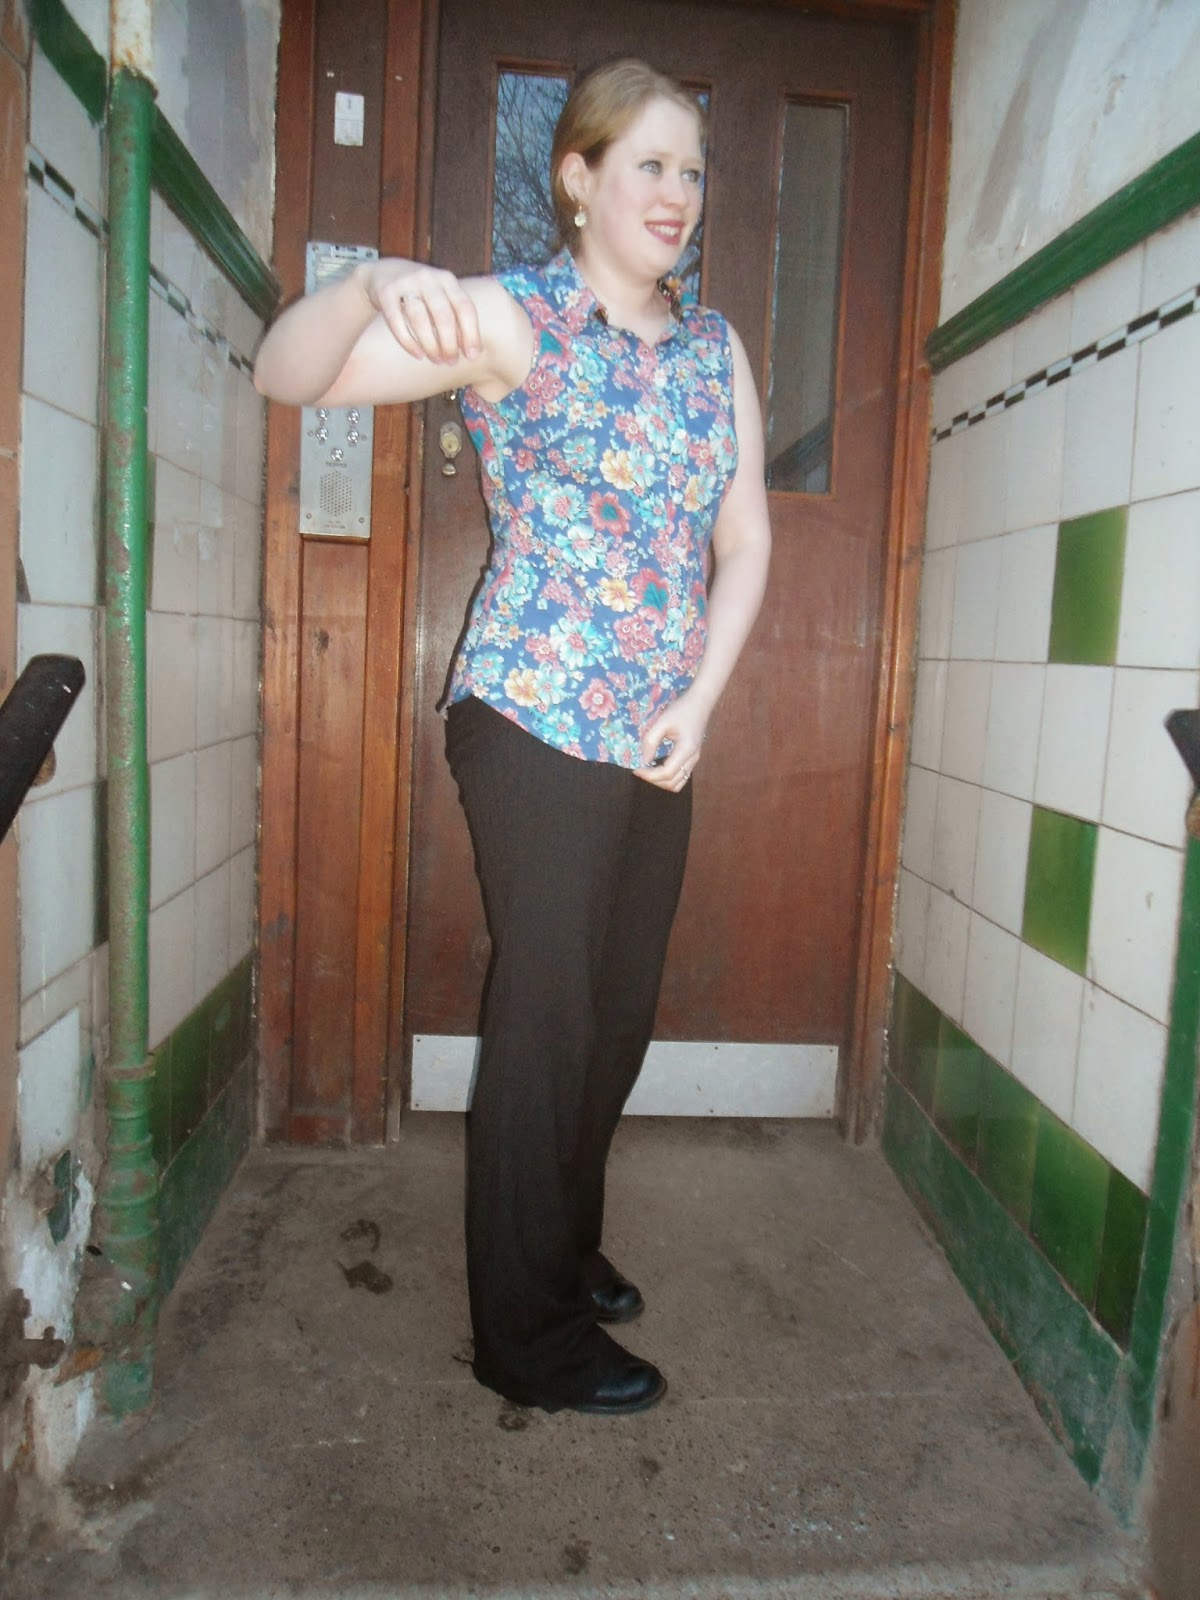
Completed: Sewaholic Granville Shirt Sans Sleeves
I greet you all today with the news that I have secured myself a new job! My PhD funding officially came to it's conclusion today...and my summer job starts umm....tomorrow!! To tell the truth it's with the same people I have done my PhD with and I'm still working in the same department however I am now no longer a student and therefore have to pay adult bills like council tax :-(. Ahh well the run had to end sometime!!!
So before the news of the new job came about I decided the best way for a pick-me-up was to buy fabric. I bought 1 m of cotton lawn with a slightly different top in mind however at the last minute changed my mind and decided to make a Granville. But due to fabric constraints it would have to be sleeveless! Not a style that I have ever worn before however I wanted to at least give it a try - after all I managed to waste the other 1.5 m on a top which looked so dreadful that I turned it into a cover for my over locker :-\
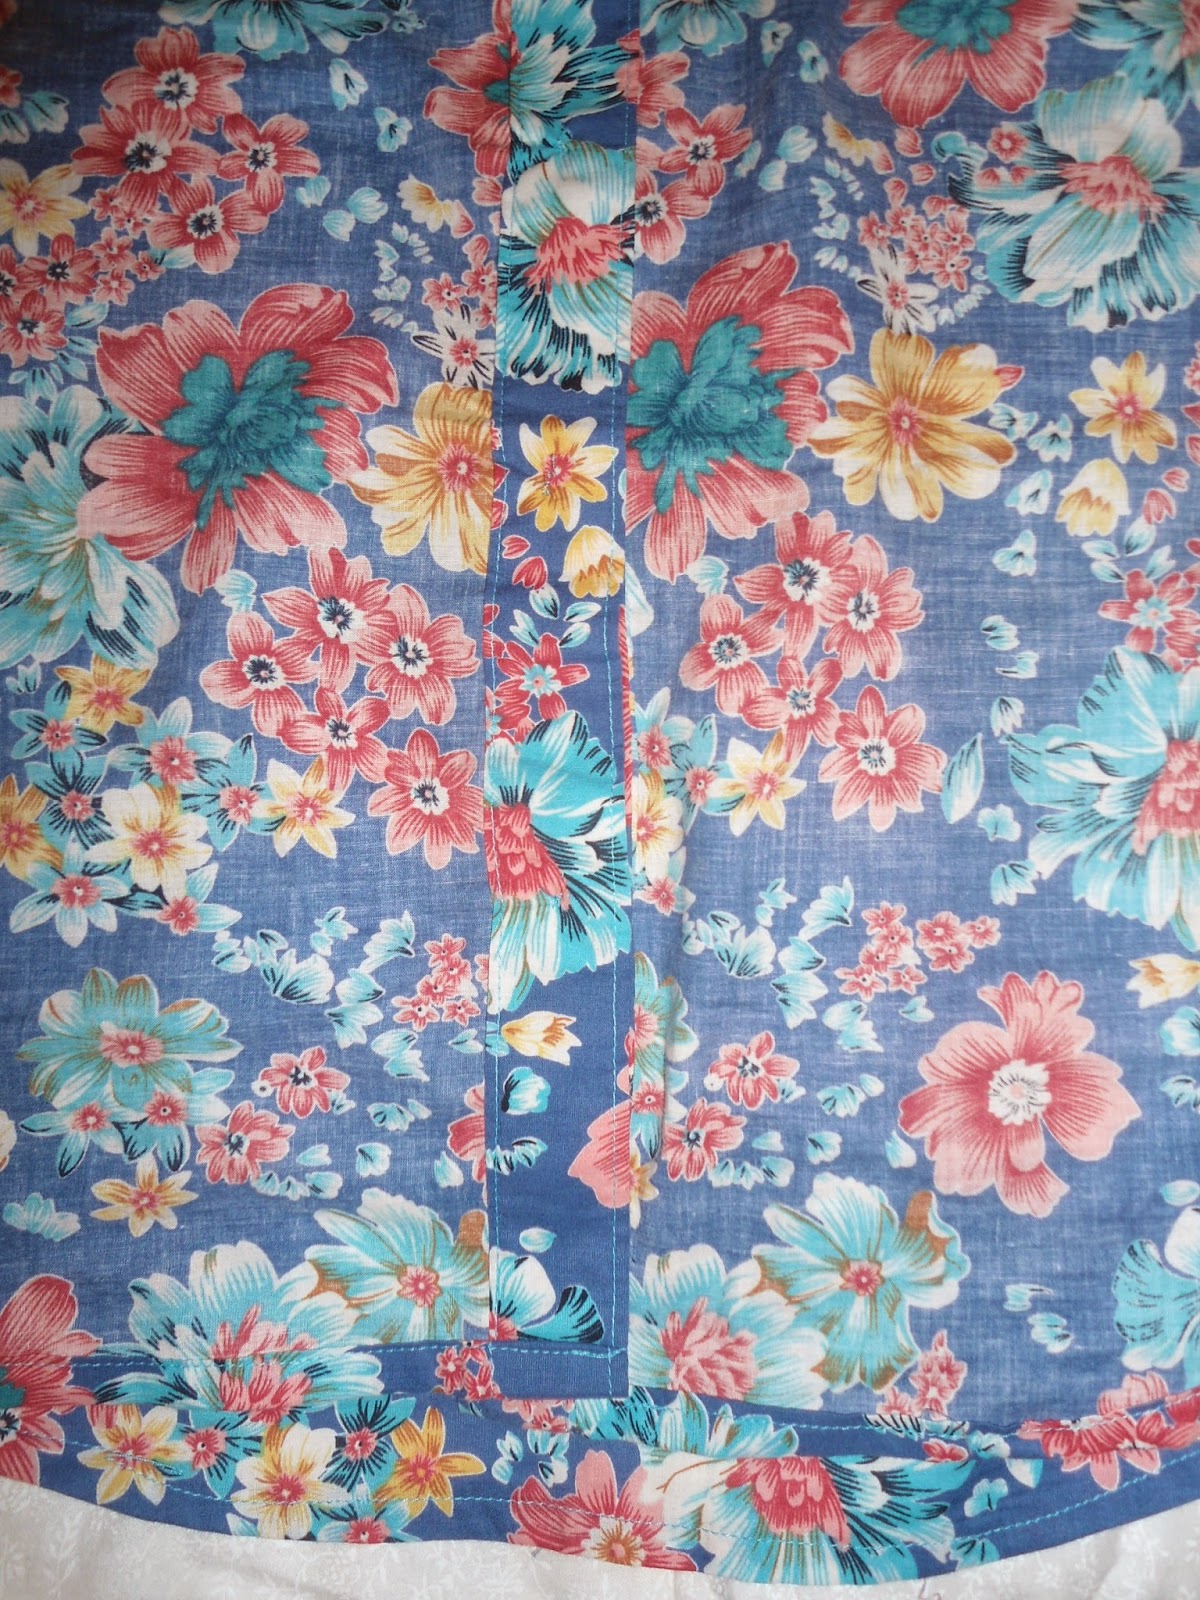
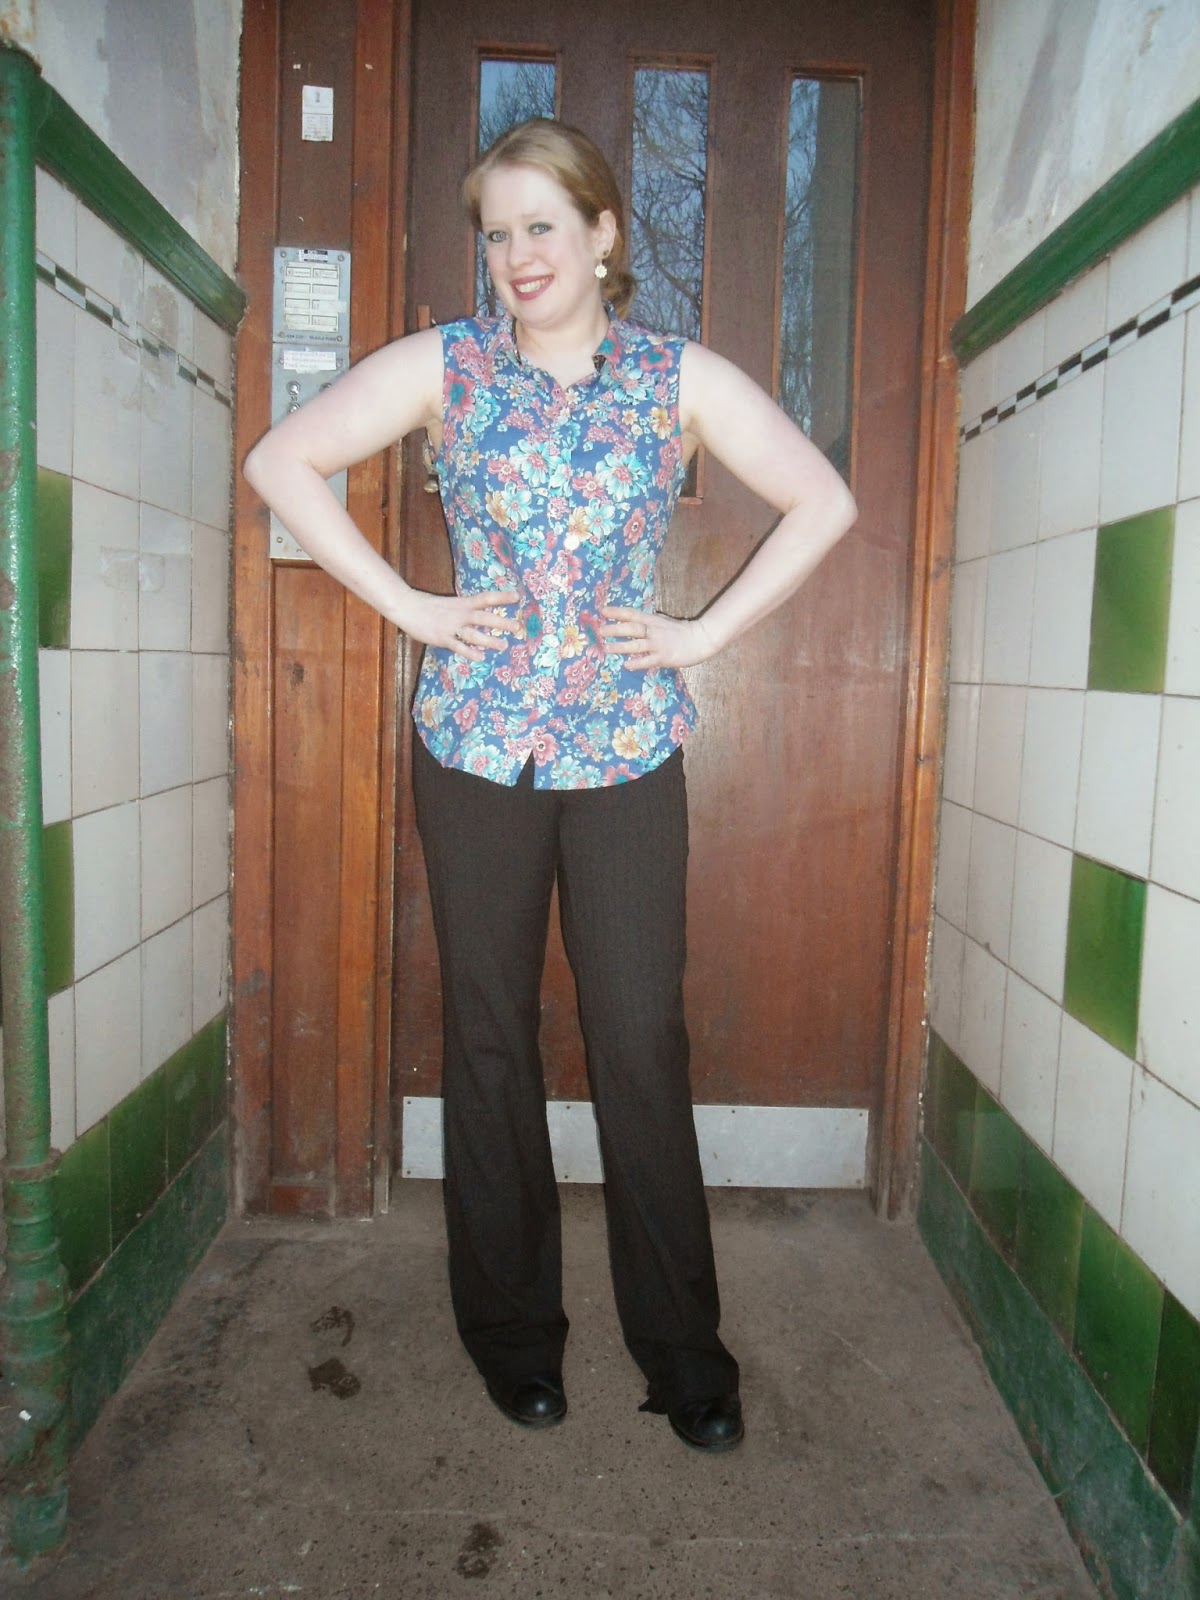
The fabric I used was this blue lawn which I think was £8/m. It handled really well and to be honest as I was being super lazy making this up I finger pressed most of the seams. And they held! Based on my measurements and the finished measurements I cut a 10 - and I think the fit is ok! There are a few areas that I want to tweak but then this is more of a wearable muslin so these were to be expected. I do however really like the way the sewaholic patterns make up on me and given that I used this size for previous patterns I was confident that this would leave me with a shirt that was quite wearable after a first pass.
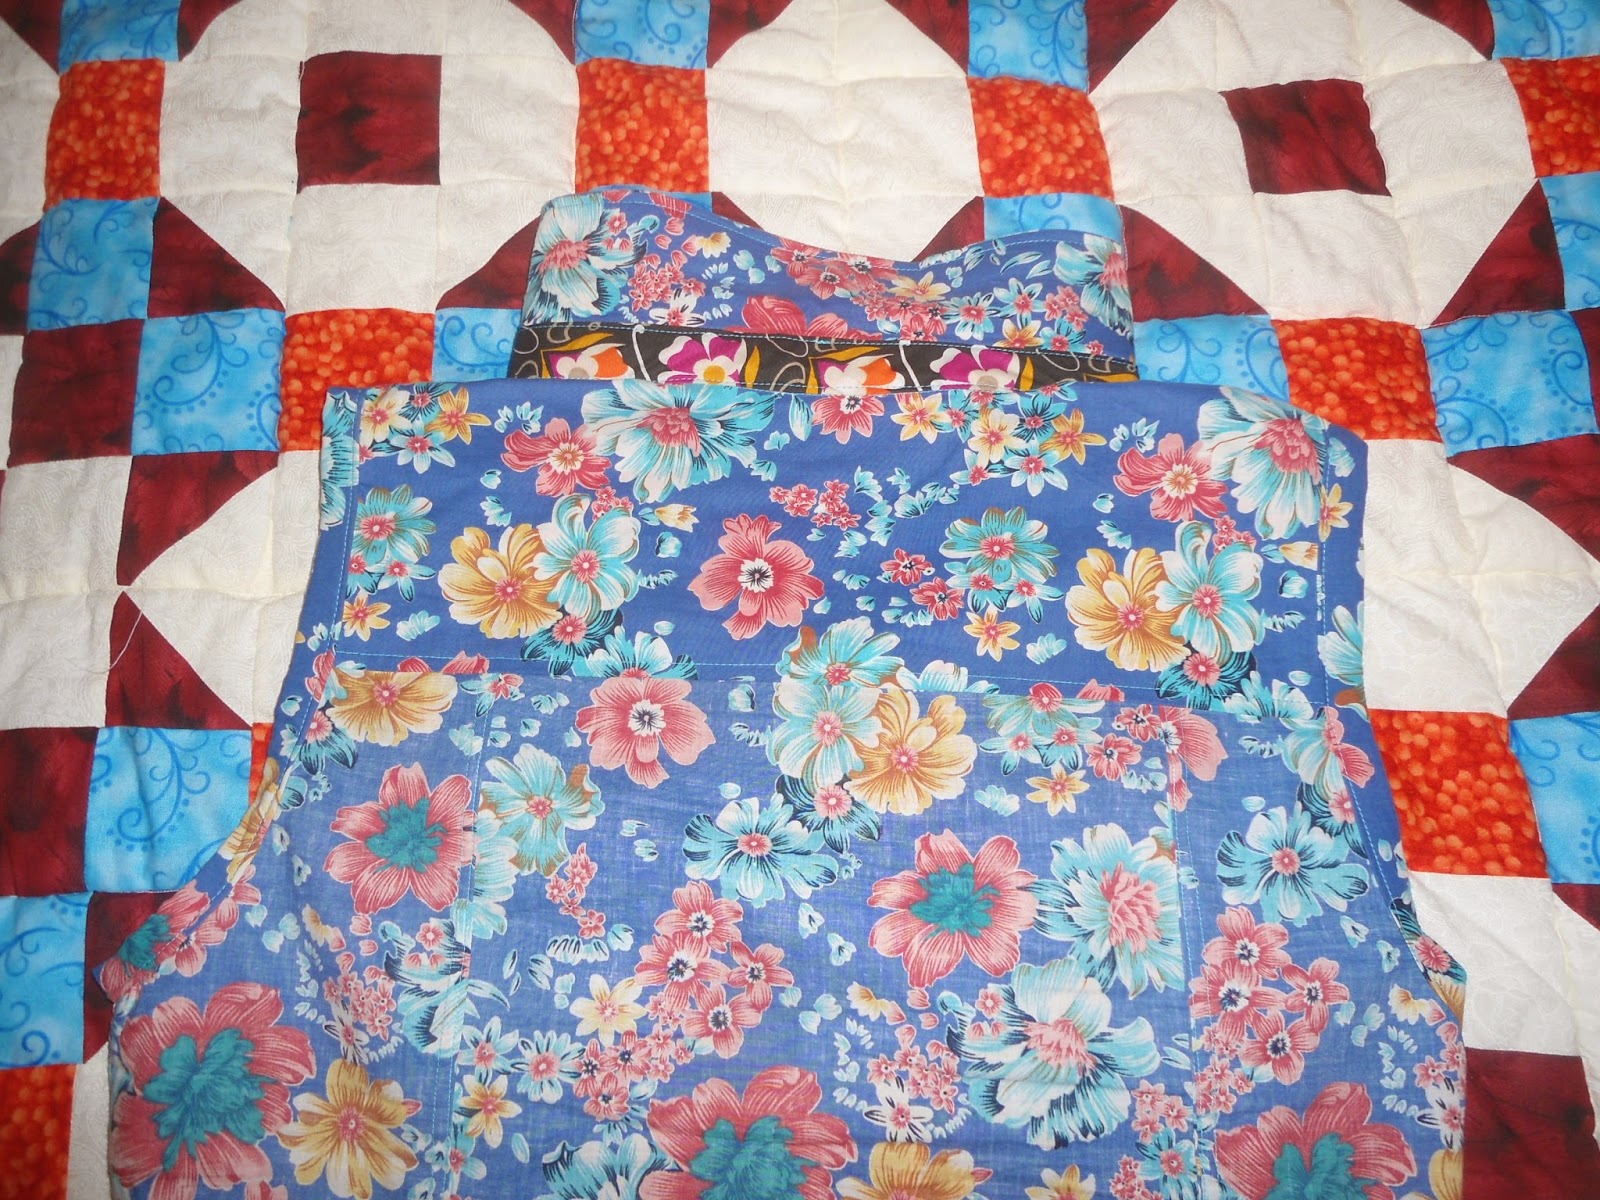
To make the shirt sleeveless I followed the directions as presented here and here. I like the fact the sewaholic blog shows pictures of how to do this as I work so much better with illustrative examples. As this was the first time I had made this shirt I really didn't have much to go on with taking length off from the shoulders and armseye so I started with an inch at the shoulder and 1 cm at the yoke like in the (sewaholic) tutorial. It seemed a legit method... When it came to adding the binding on the armholes I used 0.68 inch bias binding to the raw edge to help remove some of the excess which still existed cutting this down so that there was only about a half inch on the inside. The next time I make up this sleeveless version I will be a bit braver and cut a little more off the shoulders and armseye and add in a little at the underarm because it seems a little loose for me here.
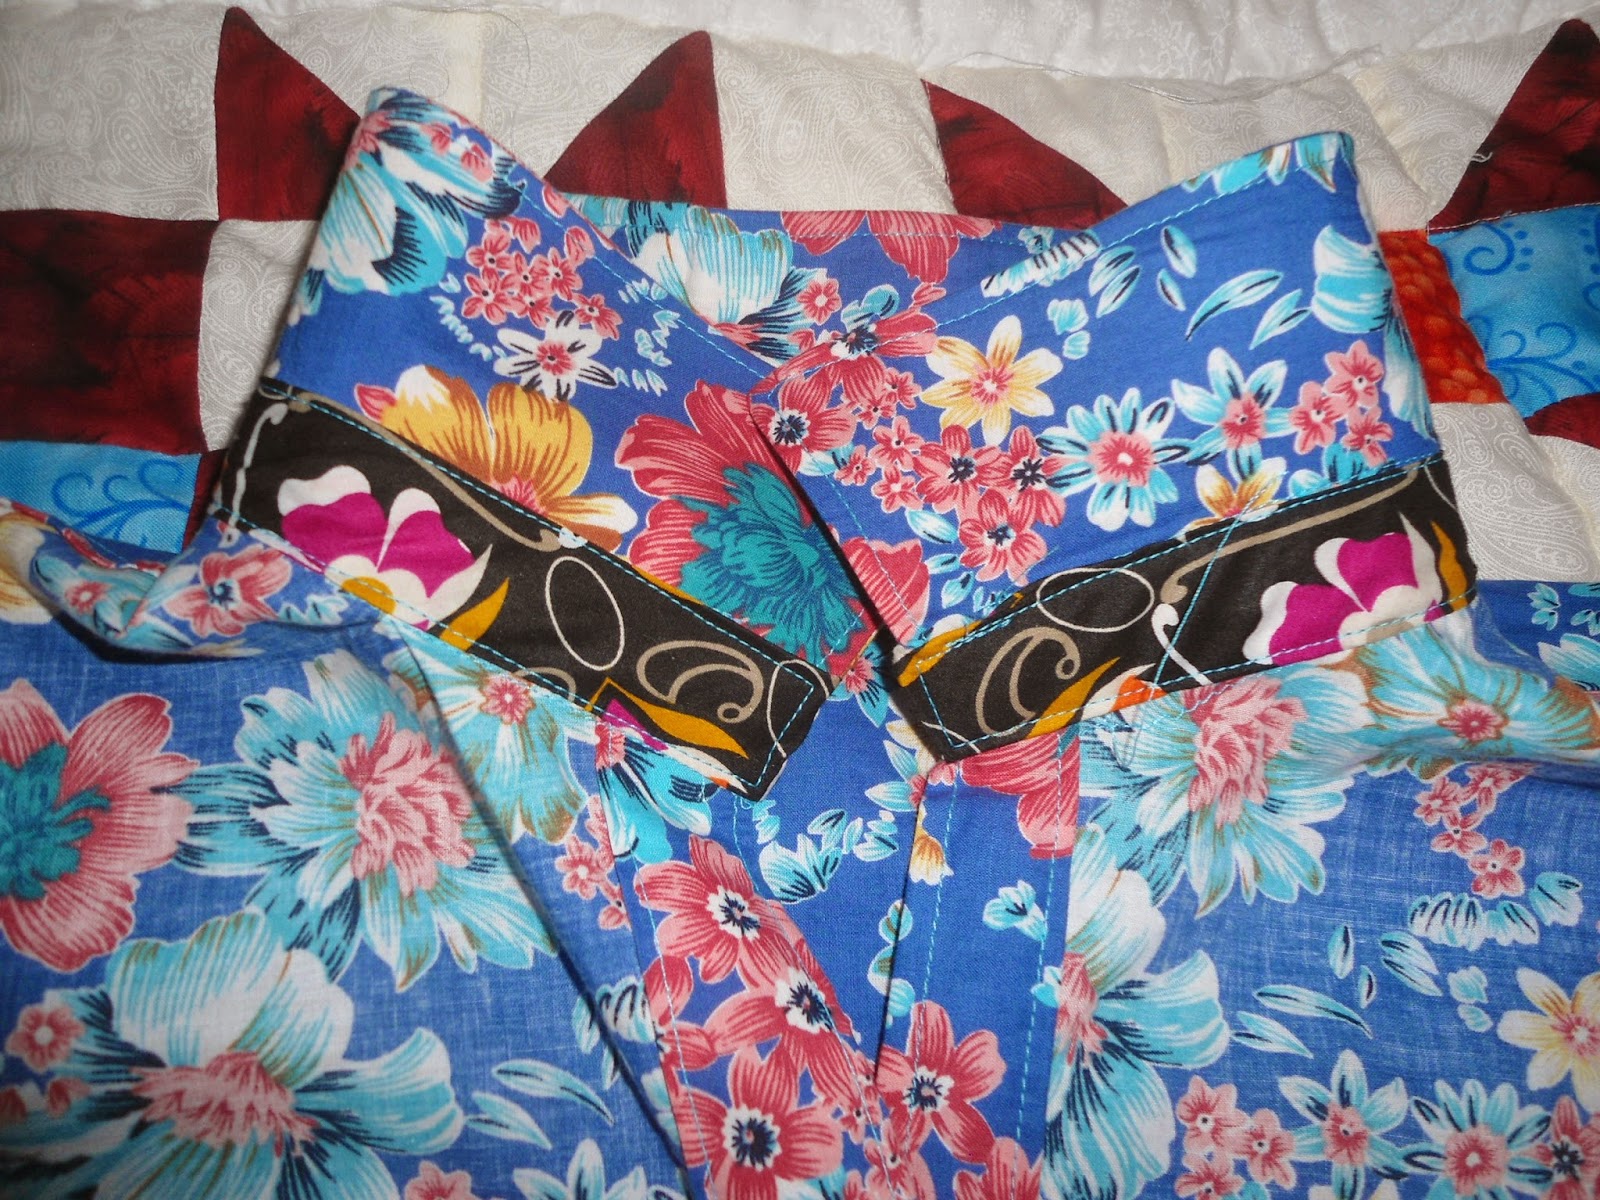
This was my first completed shirt and I have to admit I did find the collar instructions a little confusing but I think it worked out OK - if we ignore the different coloured collar stand... When I was cutting the shirt out I didn't think this would matter too much and the stand wouldn't be too noticeable, however I'm good with a random print on print eyesore!
I did really like how the method of attaching the yoke left lots of neat internal seams! As I have only ever made the Negroni before this shirt I'm not sure if there is another alternative method which works too?
I definitely want to make up another few of these shirts with the noted fitting adjustments - maybe even a few with varying lengths of sleeves... I also need to take some of the volume of fabric out of the front - another dart maybe or even just sizing down the front pieces as the fit is quite loose here but works well on the back (save for the usual excess which I was too scared to pre-empt!). Alternatively I may use this tutorial found on the curvy sewing collective blog. All I will say on the matter of making more shirts though is before I do make any more tops I will have to start on that objective of making trousers! (Please don't judge me on the horriffic state of my ancient RTW trousers!!!)
Has anyone else made up either of the two newish sewaholic blouses? I'm really feeling the sleeveless shirt look now :-)
Take care guys and have a great easter weekend!
JCS x
So before the news of the new job came about I decided the best way for a pick-me-up was to buy fabric. I bought 1 m of cotton lawn with a slightly different top in mind however at the last minute changed my mind and decided to make a Granville. But due to fabric constraints it would have to be sleeveless! Not a style that I have ever worn before however I wanted to at least give it a try - after all I managed to waste the other 1.5 m on a top which looked so dreadful that I turned it into a cover for my over locker :-\
The fabric I used was this blue lawn which I think was £8/m. It handled really well and to be honest as I was being super lazy making this up I finger pressed most of the seams. And they held! Based on my measurements and the finished measurements I cut a 10 - and I think the fit is ok! There are a few areas that I want to tweak but then this is more of a wearable muslin so these were to be expected. I do however really like the way the sewaholic patterns make up on me and given that I used this size for previous patterns I was confident that this would leave me with a shirt that was quite wearable after a first pass.
To make the shirt sleeveless I followed the directions as presented here and here. I like the fact the sewaholic blog shows pictures of how to do this as I work so much better with illustrative examples. As this was the first time I had made this shirt I really didn't have much to go on with taking length off from the shoulders and armseye so I started with an inch at the shoulder and 1 cm at the yoke like in the (sewaholic) tutorial. It seemed a legit method... When it came to adding the binding on the armholes I used 0.68 inch bias binding to the raw edge to help remove some of the excess which still existed cutting this down so that there was only about a half inch on the inside. The next time I make up this sleeveless version I will be a bit braver and cut a little more off the shoulders and armseye and add in a little at the underarm because it seems a little loose for me here.
This was my first completed shirt and I have to admit I did find the collar instructions a little confusing but I think it worked out OK - if we ignore the different coloured collar stand... When I was cutting the shirt out I didn't think this would matter too much and the stand wouldn't be too noticeable, however I'm good with a random print on print eyesore!
I did really like how the method of attaching the yoke left lots of neat internal seams! As I have only ever made the Negroni before this shirt I'm not sure if there is another alternative method which works too?
I definitely want to make up another few of these shirts with the noted fitting adjustments - maybe even a few with varying lengths of sleeves... I also need to take some of the volume of fabric out of the front - another dart maybe or even just sizing down the front pieces as the fit is quite loose here but works well on the back (save for the usual excess which I was too scared to pre-empt!). Alternatively I may use this tutorial found on the curvy sewing collective blog. All I will say on the matter of making more shirts though is before I do make any more tops I will have to start on that objective of making trousers! (Please don't judge me on the horriffic state of my ancient RTW trousers!!!)
Has anyone else made up either of the two newish sewaholic blouses? I'm really feeling the sleeveless shirt look now :-)
Take care guys and have a great easter weekend!
JCS x
Labels:
2015 makes,
New Job,
Sewaholic,
sewing,
shirt
Saturday, 21 March 2015
Kompleted: Kim Sewalong Dress
Sorry for the title I couldn't resist.
I was sewing along with the Kim sewalong over at the BHL blog and today I would like to share my finished Kim. I actually have two copies of this pattern. I wasn't expecting the Kim dress as part of my kickstarter bundle, so when I saw it on pre-sale I snapped it up. I think something about their decision to stop printing the Georgia dress meant that they substituted Kim. No matter. Whatever happens the spare one will not go to waste!
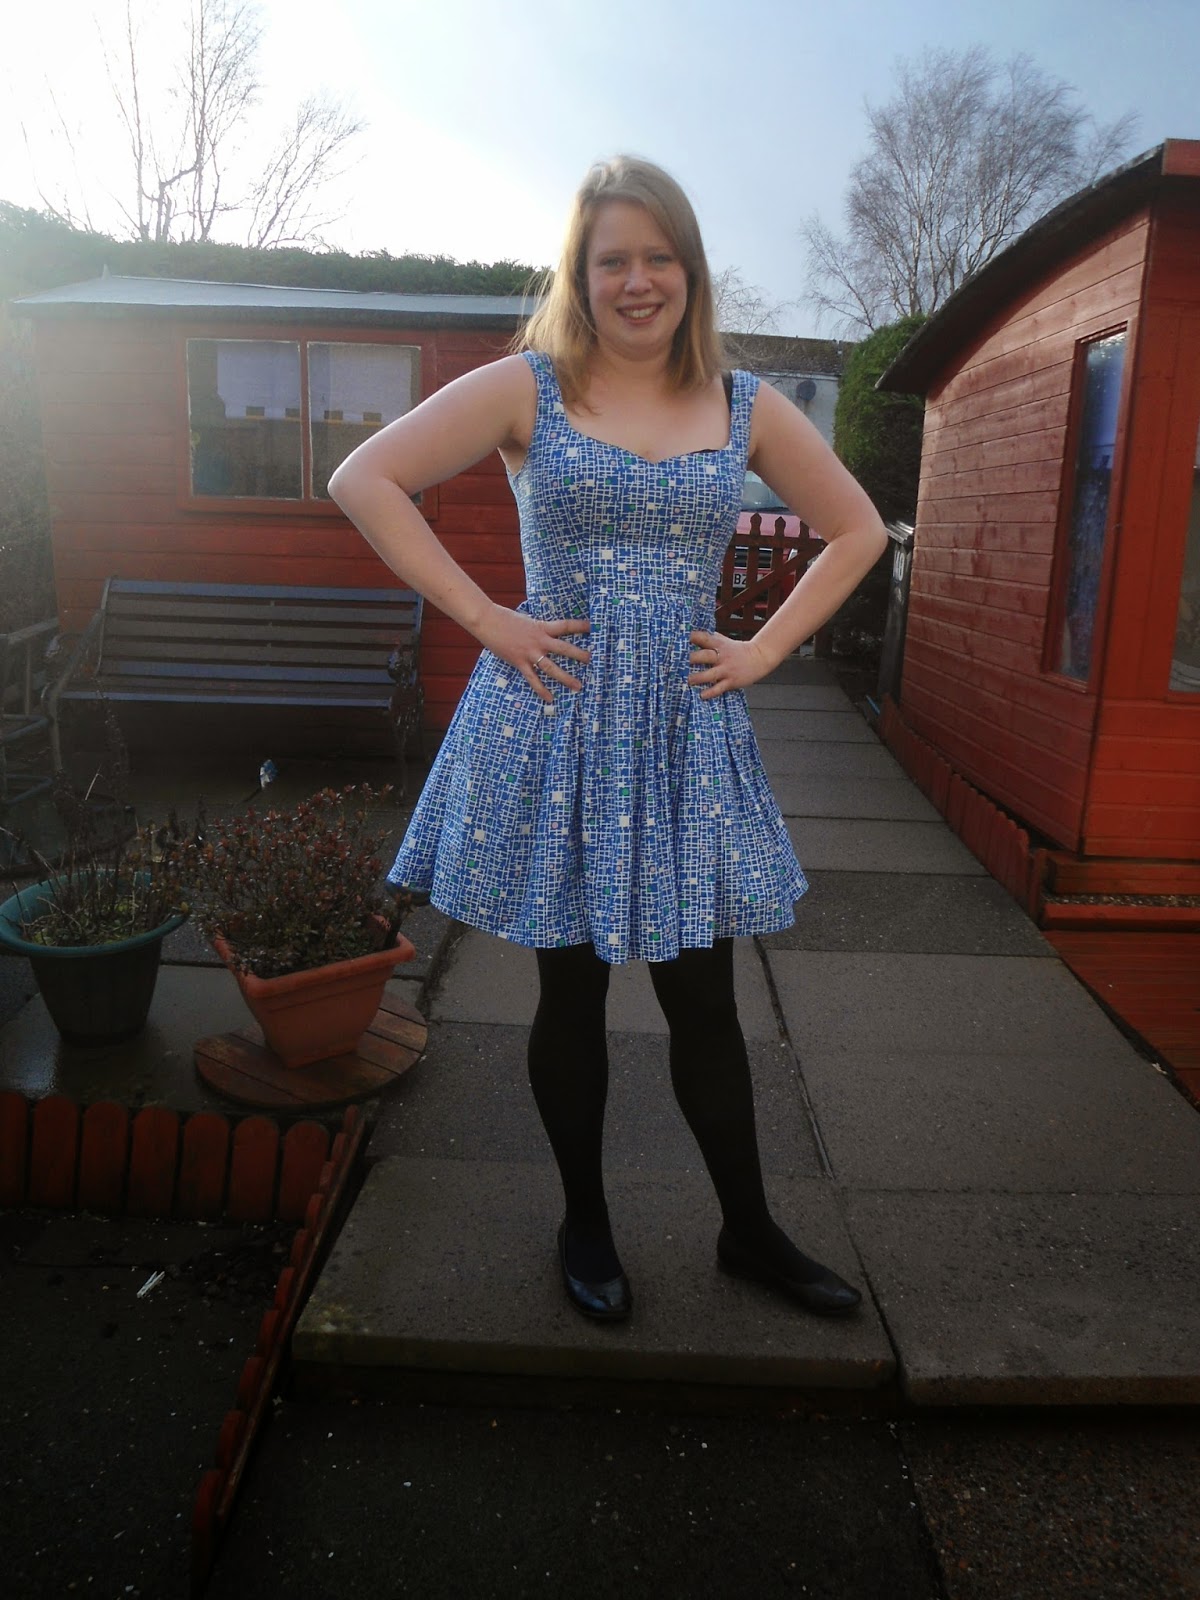
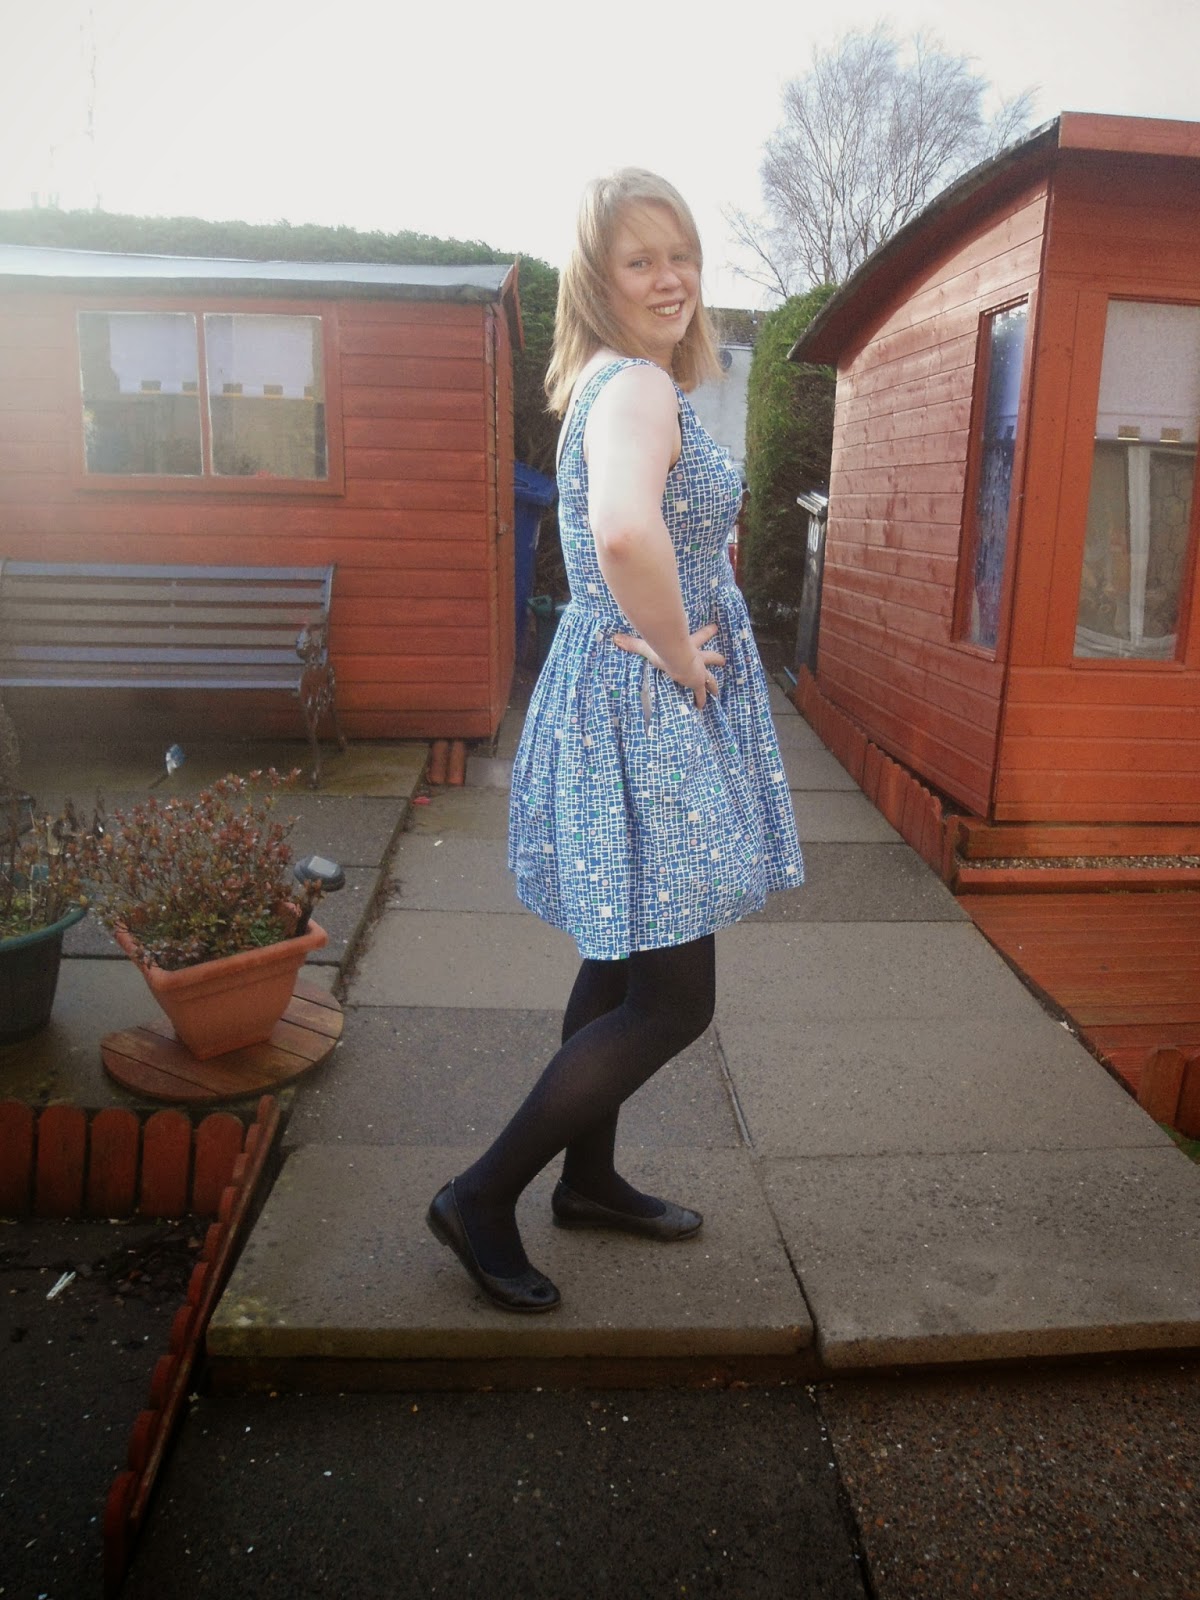
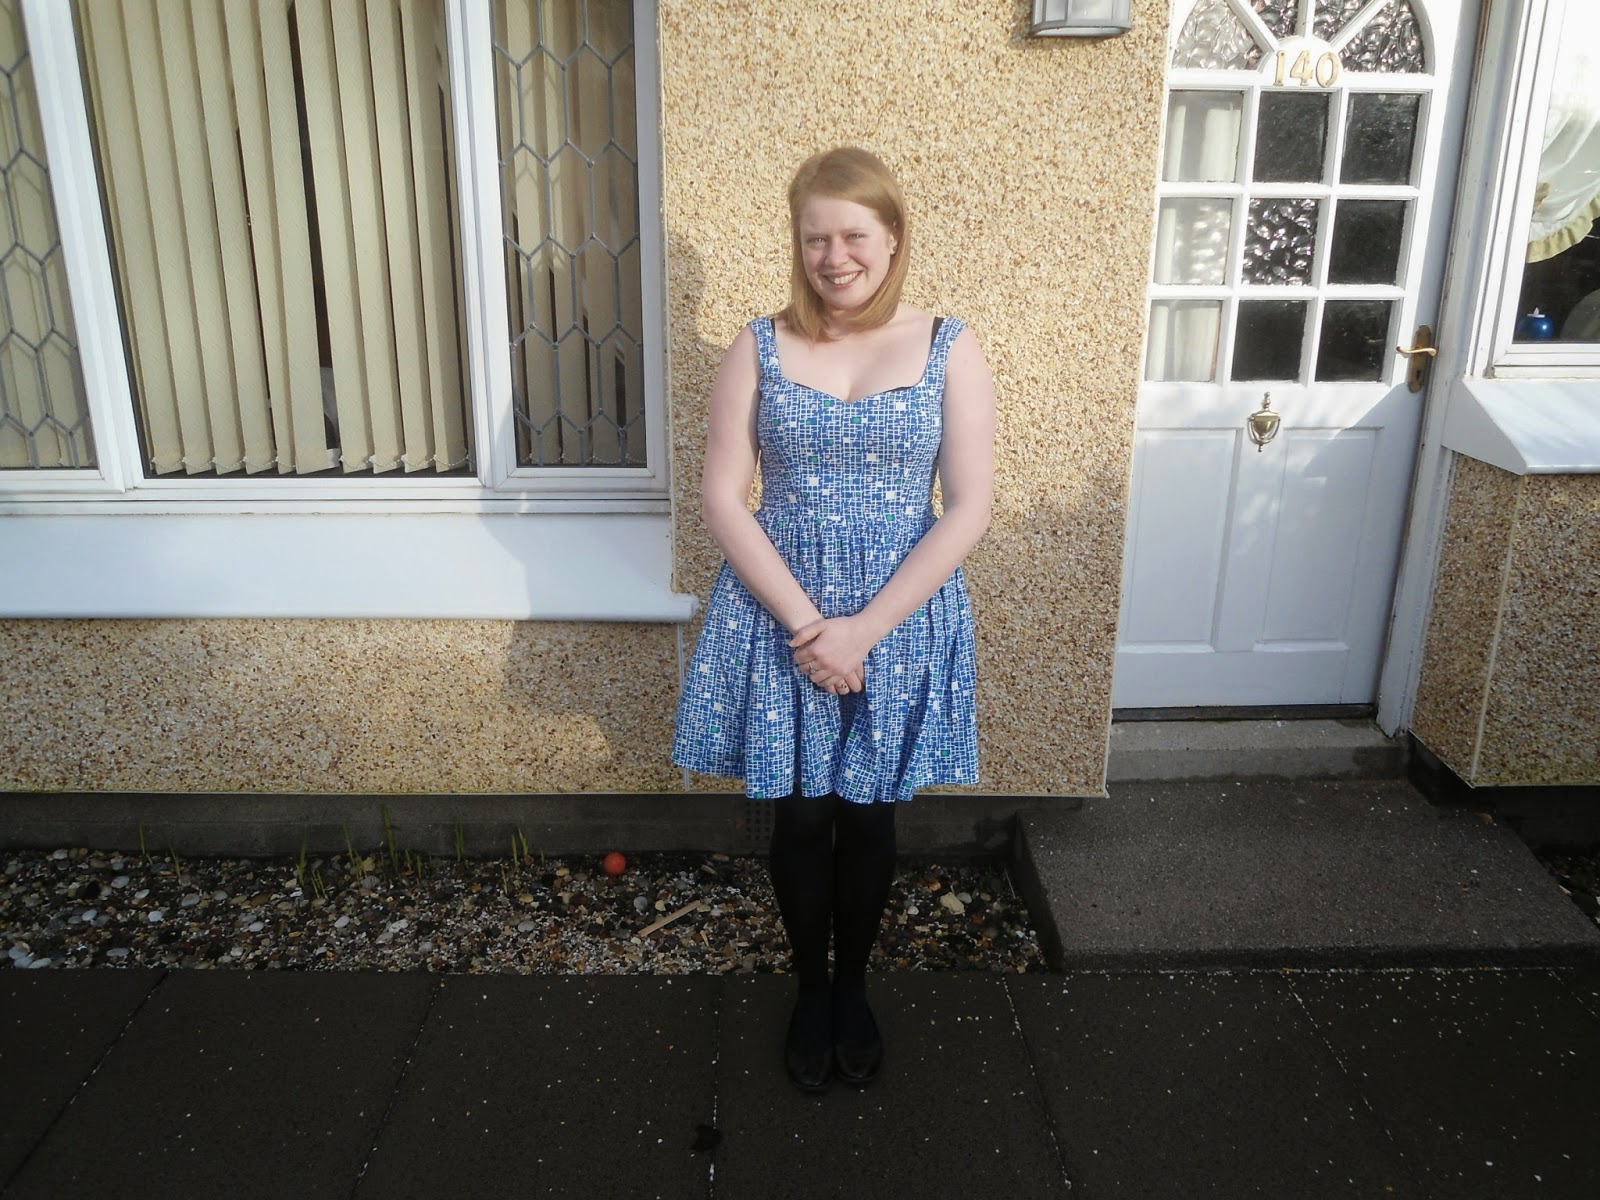
The fabric for this dress was bought in the sale at John Lewis and is a Hemingway design which is 100 % cotton and cost around £5 /m I can't remember the exact price (I saw it subsequently in another fabric store for about £12/m so bargain!!). I bought 2 m of this fabric and used only about 1.5 m. I then cut the rest into lots of varying sized squares which I plan on using within a quilt. The other remnants have been set aside for another (still secret) project ;-). I love it when this happens as then it seems like the next project is free!
I made up a muslin of this dress using the wrap skirt around Christmas however was never too happy with the resultant fit. I transferred a few changes onto the pattern pieces however I think I still require more :-(. The muslin was mostly OK - from a few days wear I assessed that the back neckline needed a little more taking in and the straps were a little too long.
Take 2 has resulted in a dress which fitted pretty good until it came to my bust - I removed a wedge the first time which left a still gaping back so then returned and removed a little more. The dress was now an inch too narrow! I unpicked the zip and it now sits on the very edge of the fabric so I'll need to remember this if I make it up again. The tops of the straps were sewn with a 3/4" seam allowance which meant the outcome was a little snug around the back of my shoulder so maybe next time I'll drop the armseye a little? They are however the correct length now. So there's that. I think the sweetheart needs a little bit of a raise too - this isn't an unusual bra for me so the fact you can see the top of the bra suggests that this needs raising a touch. nothing major though.
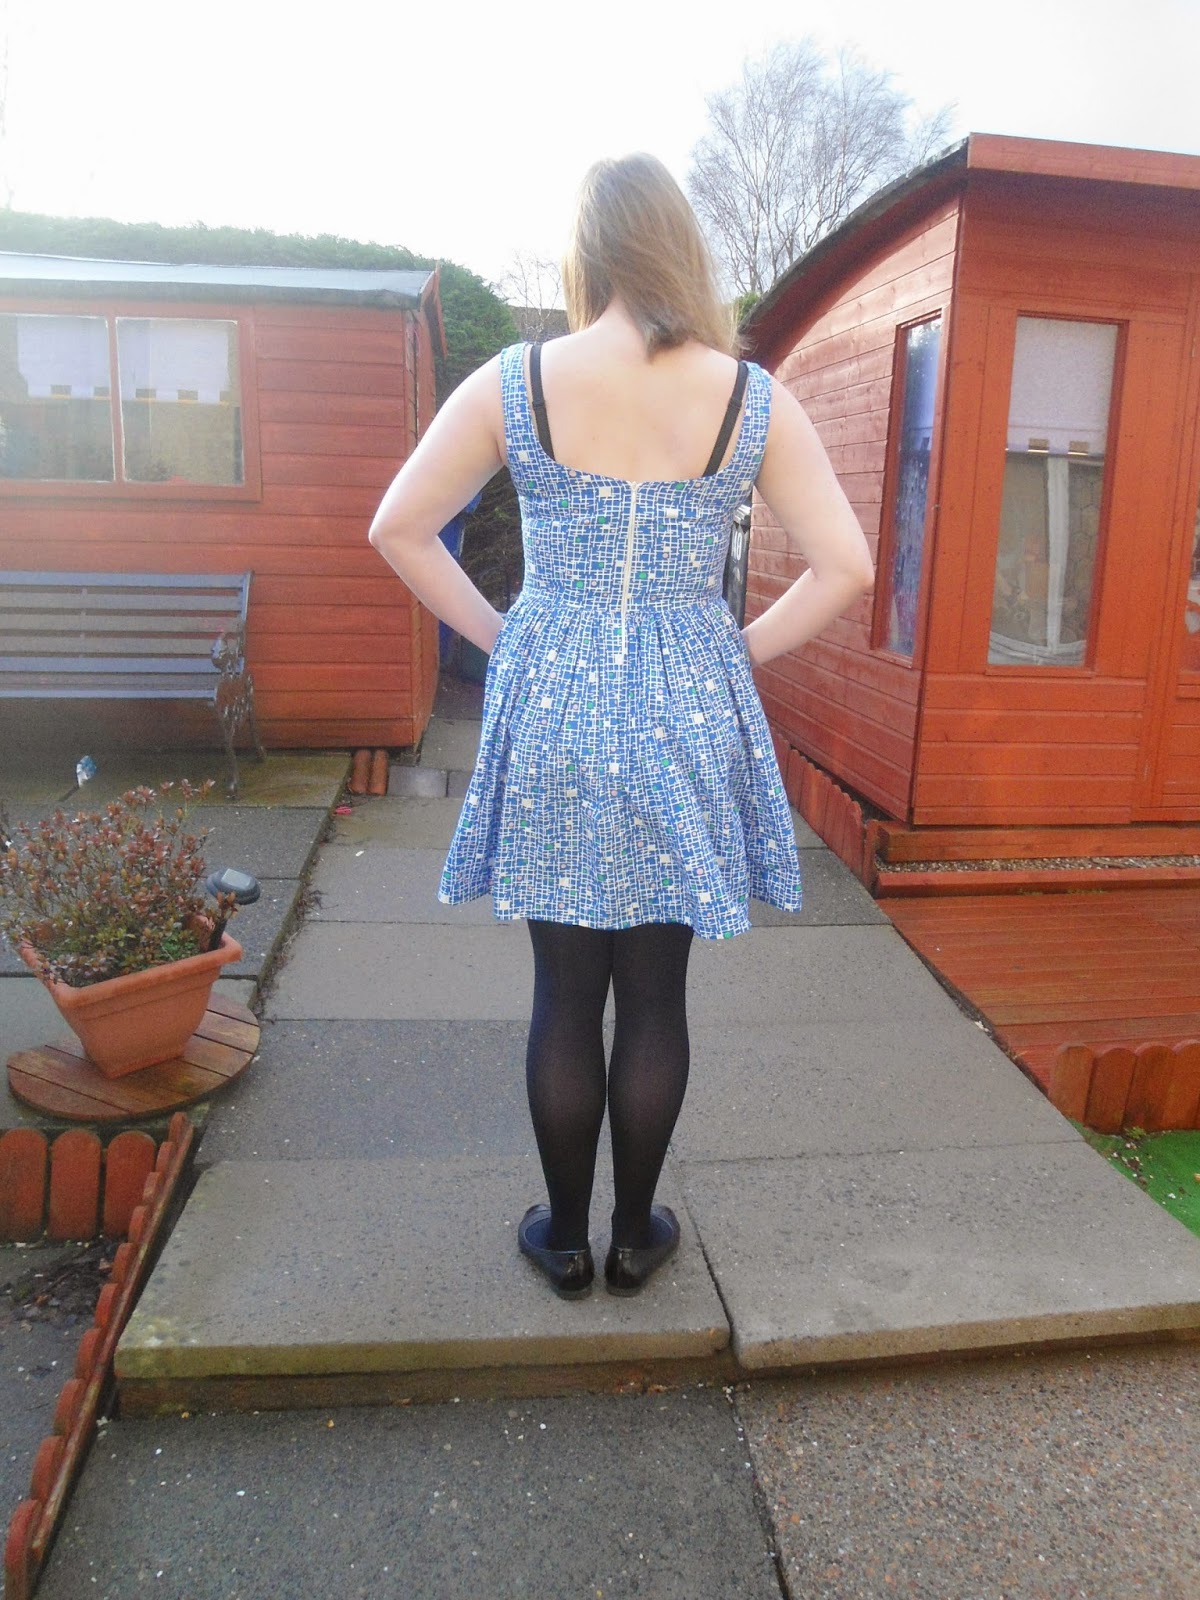
The straps of this dress are still sitting too wide on my shoulders so thats another reason why you get a great view of my bra. What I'm thinking if I make version 3 is to take some width out of the CF side seams and then add it back in to the side seam of the SF piece. Another method I'm toying with is to try a narrow shoulder adjustment - however I'm not 100 % convinced that this will fix the issue as the base of the arms is still very wide. Does anyone have any thoughts on this?
One other change that I'm toying with making is to make a small sway back adjustment. This adjustment makes sense as taking the length out of the straps has lifted the waistline so that it now sits on my natural waist however seems to dip by the time the seam hits the middle of my back and bags out a little. another slight disclaimer: I made a slight error in cutting my skirt fabric - I measured the length from my waist to my knee and cut this length. Completely omitting seam allowances and hem allowances. Ooops!! So its a Kim Mini really....
So I'm mostly happy :-D however it seems that by the time the fit is 'just so' this will no longer be the Kim dress :-p. This is still very much a wearable dress although I am a bit annoyed at the zip - it seems to line up ok at the seams however as I always find when I buy poorer quality John Lewis zips I can never get the zip invisible. *Jennifer learn from this*!!!
Did anyone else been taking part in the Kim Sew Along?
Have a good weekend all :-) (I'm currently waiting for my parents to get up so we can go on some advnture in Glasgow somewhere!)
JCS xx
I was sewing along with the Kim sewalong over at the BHL blog and today I would like to share my finished Kim. I actually have two copies of this pattern. I wasn't expecting the Kim dress as part of my kickstarter bundle, so when I saw it on pre-sale I snapped it up. I think something about their decision to stop printing the Georgia dress meant that they substituted Kim. No matter. Whatever happens the spare one will not go to waste!
| I Totally added pockets to this dress! - A variation on the emery pockets, sewn into the waistline |
The fabric for this dress was bought in the sale at John Lewis and is a Hemingway design which is 100 % cotton and cost around £5 /m I can't remember the exact price (I saw it subsequently in another fabric store for about £12/m so bargain!!). I bought 2 m of this fabric and used only about 1.5 m. I then cut the rest into lots of varying sized squares which I plan on using within a quilt. The other remnants have been set aside for another (still secret) project ;-). I love it when this happens as then it seems like the next project is free!
I made up a muslin of this dress using the wrap skirt around Christmas however was never too happy with the resultant fit. I transferred a few changes onto the pattern pieces however I think I still require more :-(. The muslin was mostly OK - from a few days wear I assessed that the back neckline needed a little more taking in and the straps were a little too long.
Take 2 has resulted in a dress which fitted pretty good until it came to my bust - I removed a wedge the first time which left a still gaping back so then returned and removed a little more. The dress was now an inch too narrow! I unpicked the zip and it now sits on the very edge of the fabric so I'll need to remember this if I make it up again. The tops of the straps were sewn with a 3/4" seam allowance which meant the outcome was a little snug around the back of my shoulder so maybe next time I'll drop the armseye a little? They are however the correct length now. So there's that. I think the sweetheart needs a little bit of a raise too - this isn't an unusual bra for me so the fact you can see the top of the bra suggests that this needs raising a touch. nothing major though.
The straps of this dress are still sitting too wide on my shoulders so thats another reason why you get a great view of my bra. What I'm thinking if I make version 3 is to take some width out of the CF side seams and then add it back in to the side seam of the SF piece. Another method I'm toying with is to try a narrow shoulder adjustment - however I'm not 100 % convinced that this will fix the issue as the base of the arms is still very wide. Does anyone have any thoughts on this?
One other change that I'm toying with making is to make a small sway back adjustment. This adjustment makes sense as taking the length out of the straps has lifted the waistline so that it now sits on my natural waist however seems to dip by the time the seam hits the middle of my back and bags out a little. another slight disclaimer: I made a slight error in cutting my skirt fabric - I measured the length from my waist to my knee and cut this length. Completely omitting seam allowances and hem allowances. Ooops!! So its a Kim Mini really....
So I'm mostly happy :-D however it seems that by the time the fit is 'just so' this will no longer be the Kim dress :-p. This is still very much a wearable dress although I am a bit annoyed at the zip - it seems to line up ok at the seams however as I always find when I buy poorer quality John Lewis zips I can never get the zip invisible. *Jennifer learn from this*!!!
Did anyone else been taking part in the Kim Sew Along?
Have a good weekend all :-) (I'm currently waiting for my parents to get up so we can go on some advnture in Glasgow somewhere!)
JCS xx
Labels:
#kimsewalong,
2015,
2015 makes,
By Hand London,
dresses,
dressmaking,
kimdress,
sewing
Location:
Glasgow, Glasgow City, UK
Friday, 6 March 2015
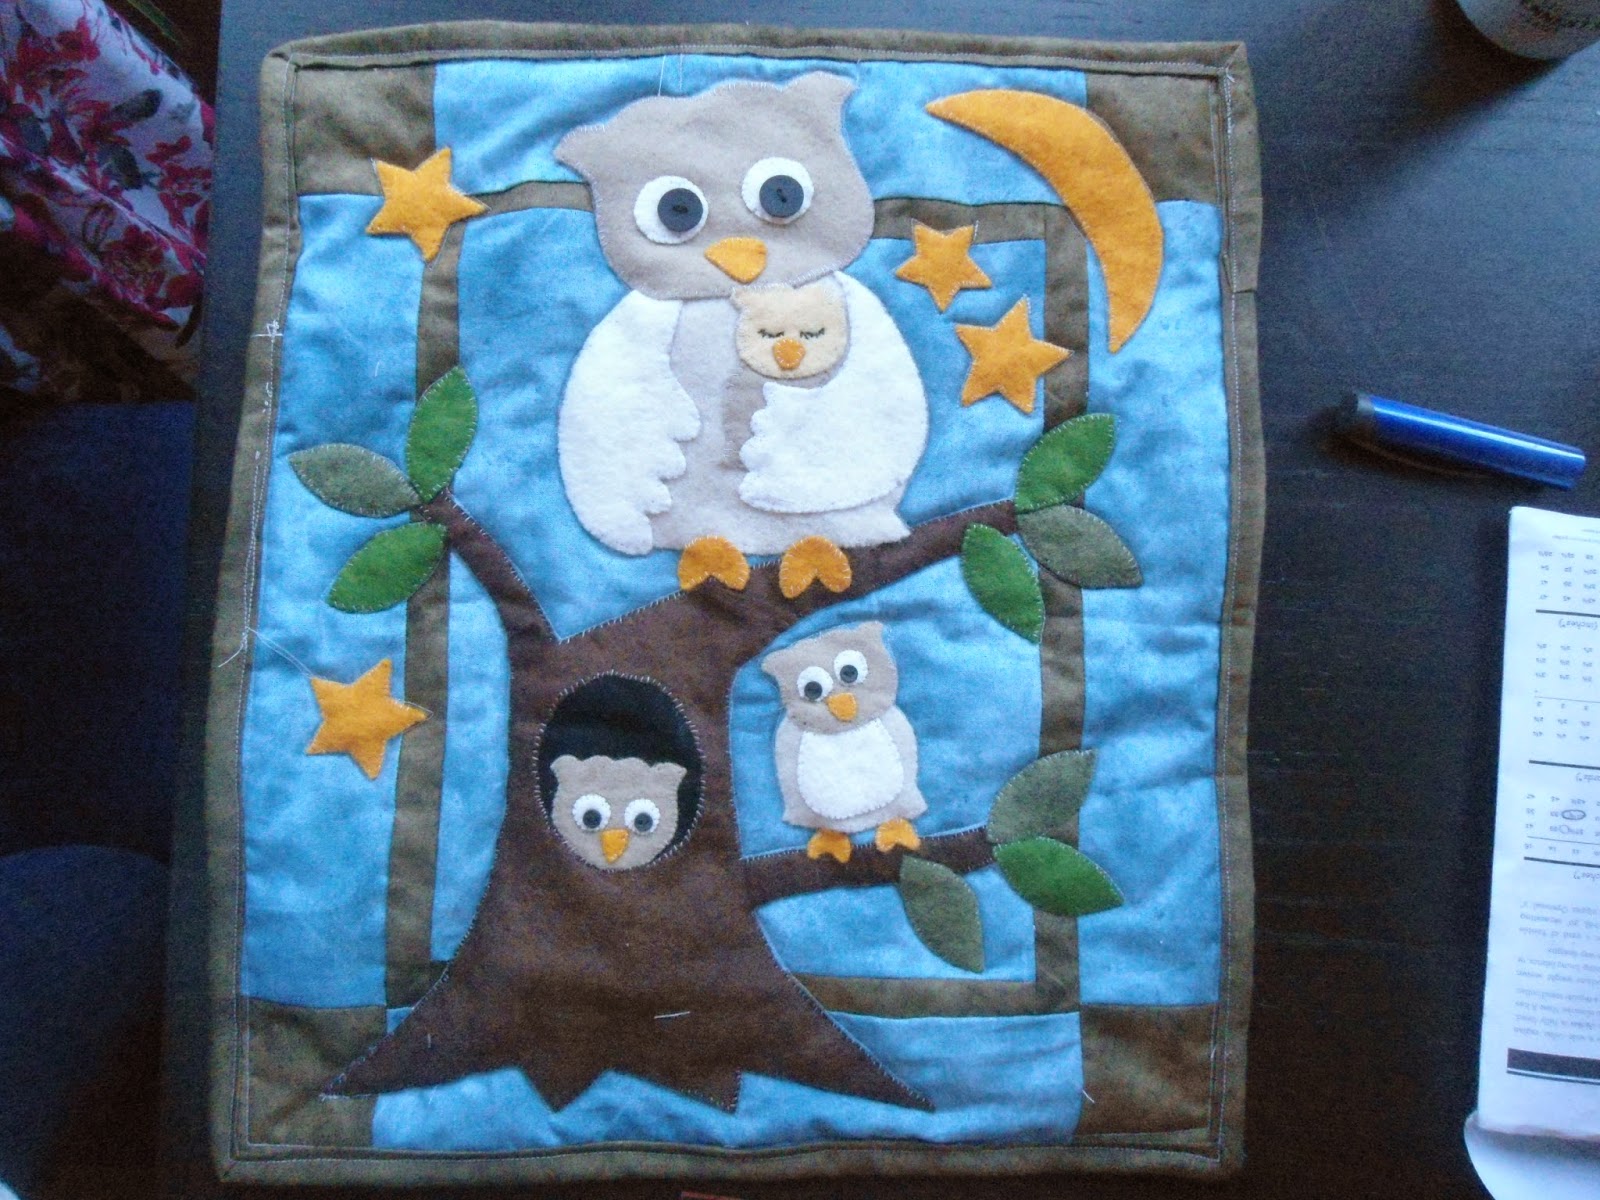
Applique Felt Owl Project
So now that I'm getting to the business end of my PhD, sewing time is definitely decreasing and each project seems to be taking longer and longer! Recently instead of starting something new I have gone back and picked out my sole remaining WIP (well the last one that I'm going to salvage!!) to help clear out my sewing space and allow a more organised move forwards.
So in light of the fact I've no real photos to share on my current WIP here's a little project that I worked on for a while last year. It had been one of these ones that was ongoing in the background while I made loads of other projects as I had a very liberal timescale for this. My friend's birthday was on November the 11th and she loves owls - so i thought that this would make a great present - plus I didn't have to send this one as I visited at the end of November. I also bought the kit around mid march so was in no hurry to get things done.
This project came as a kit with everything included including stencils and a small instruction sheet.
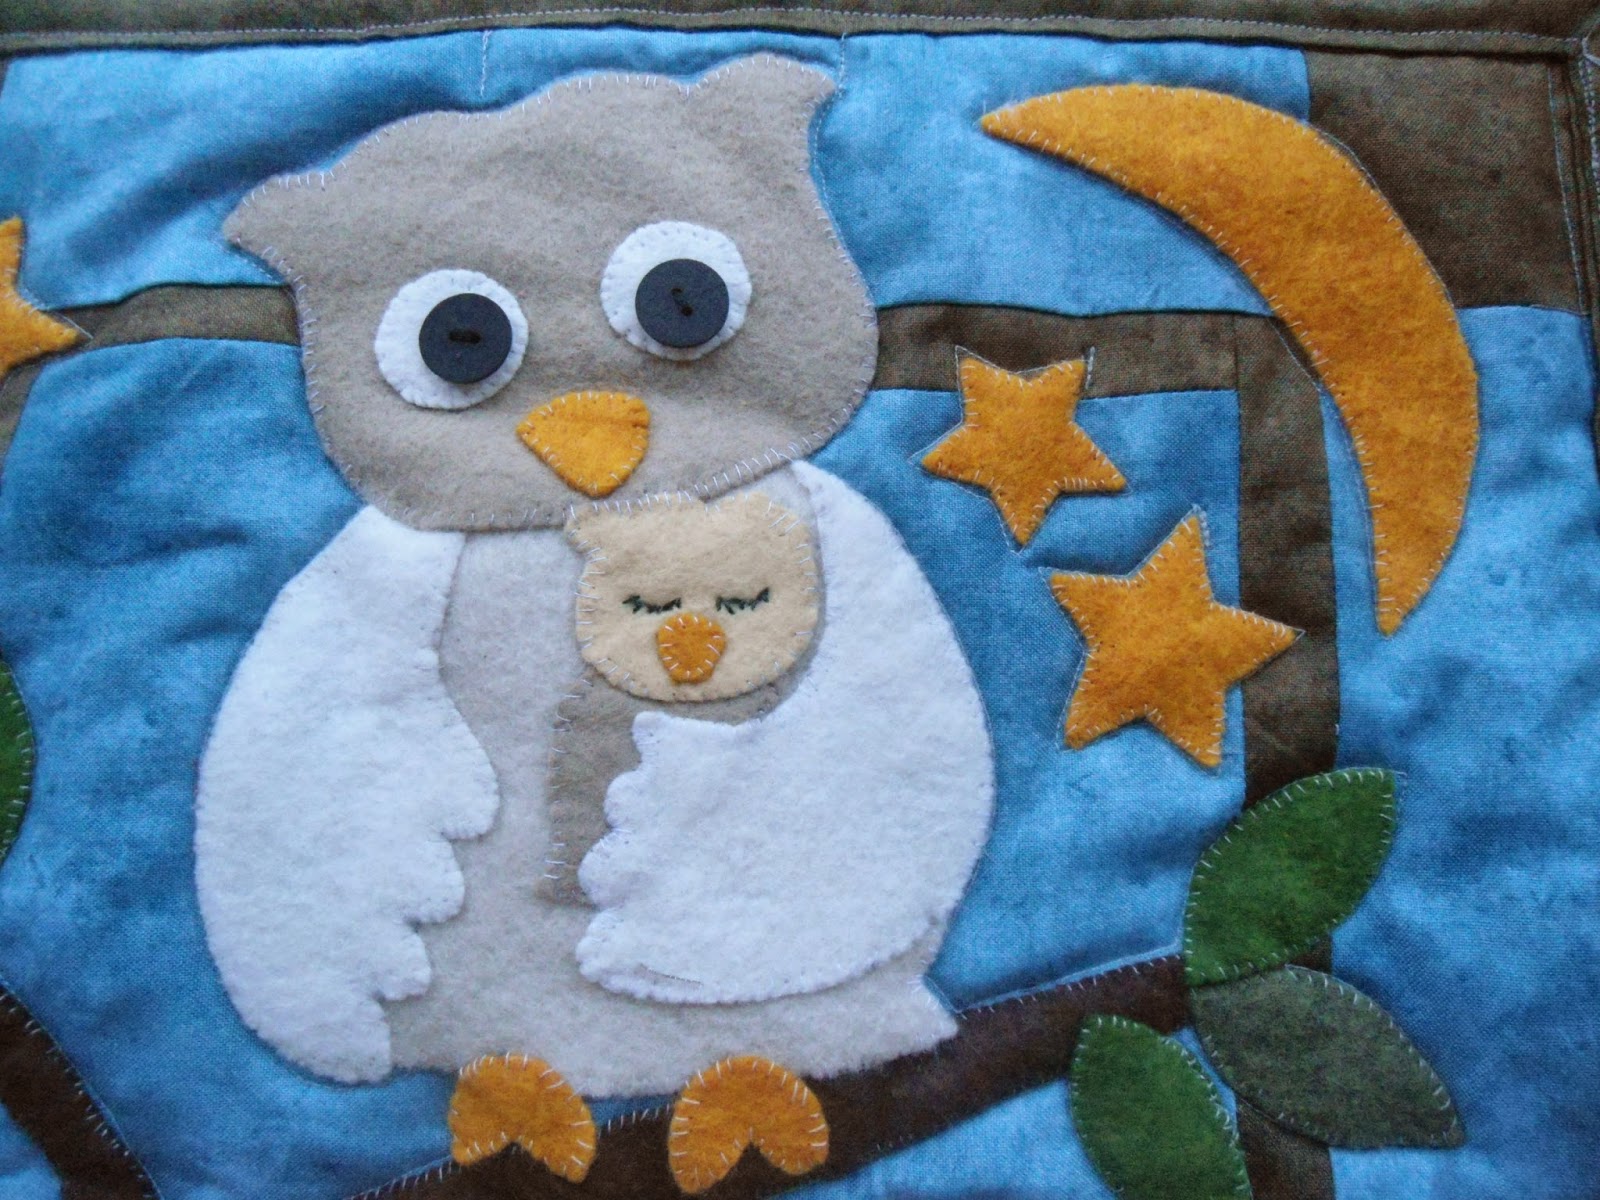
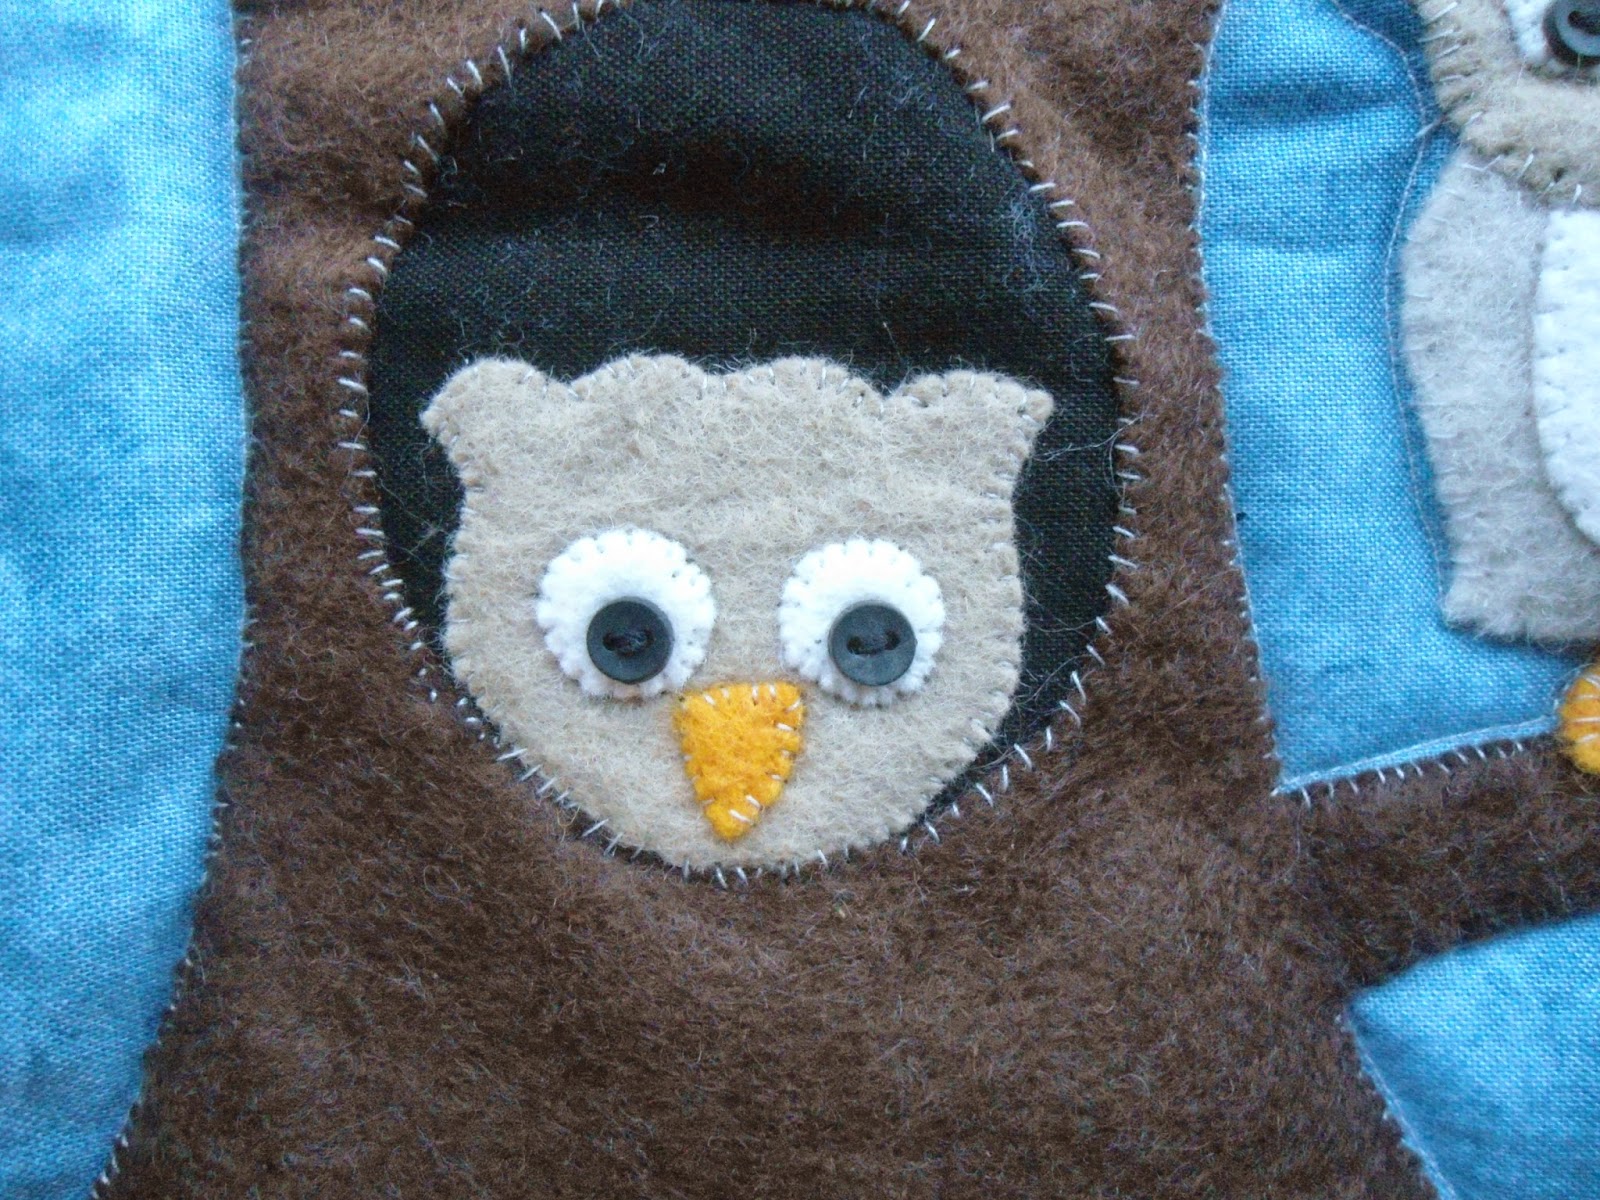
I found this a great starter project for applique as the felt doesn't fray and is very easy to work with. All the pieces were hand stitched together with a mid grey lightweight thread. I didn't reckon that this would see much wear and tear so didn't use an expensive thread. I also used grey for appliqueing everything and did not change colours between objects because as the owls were light anyway I didn't think it showed up much at all.
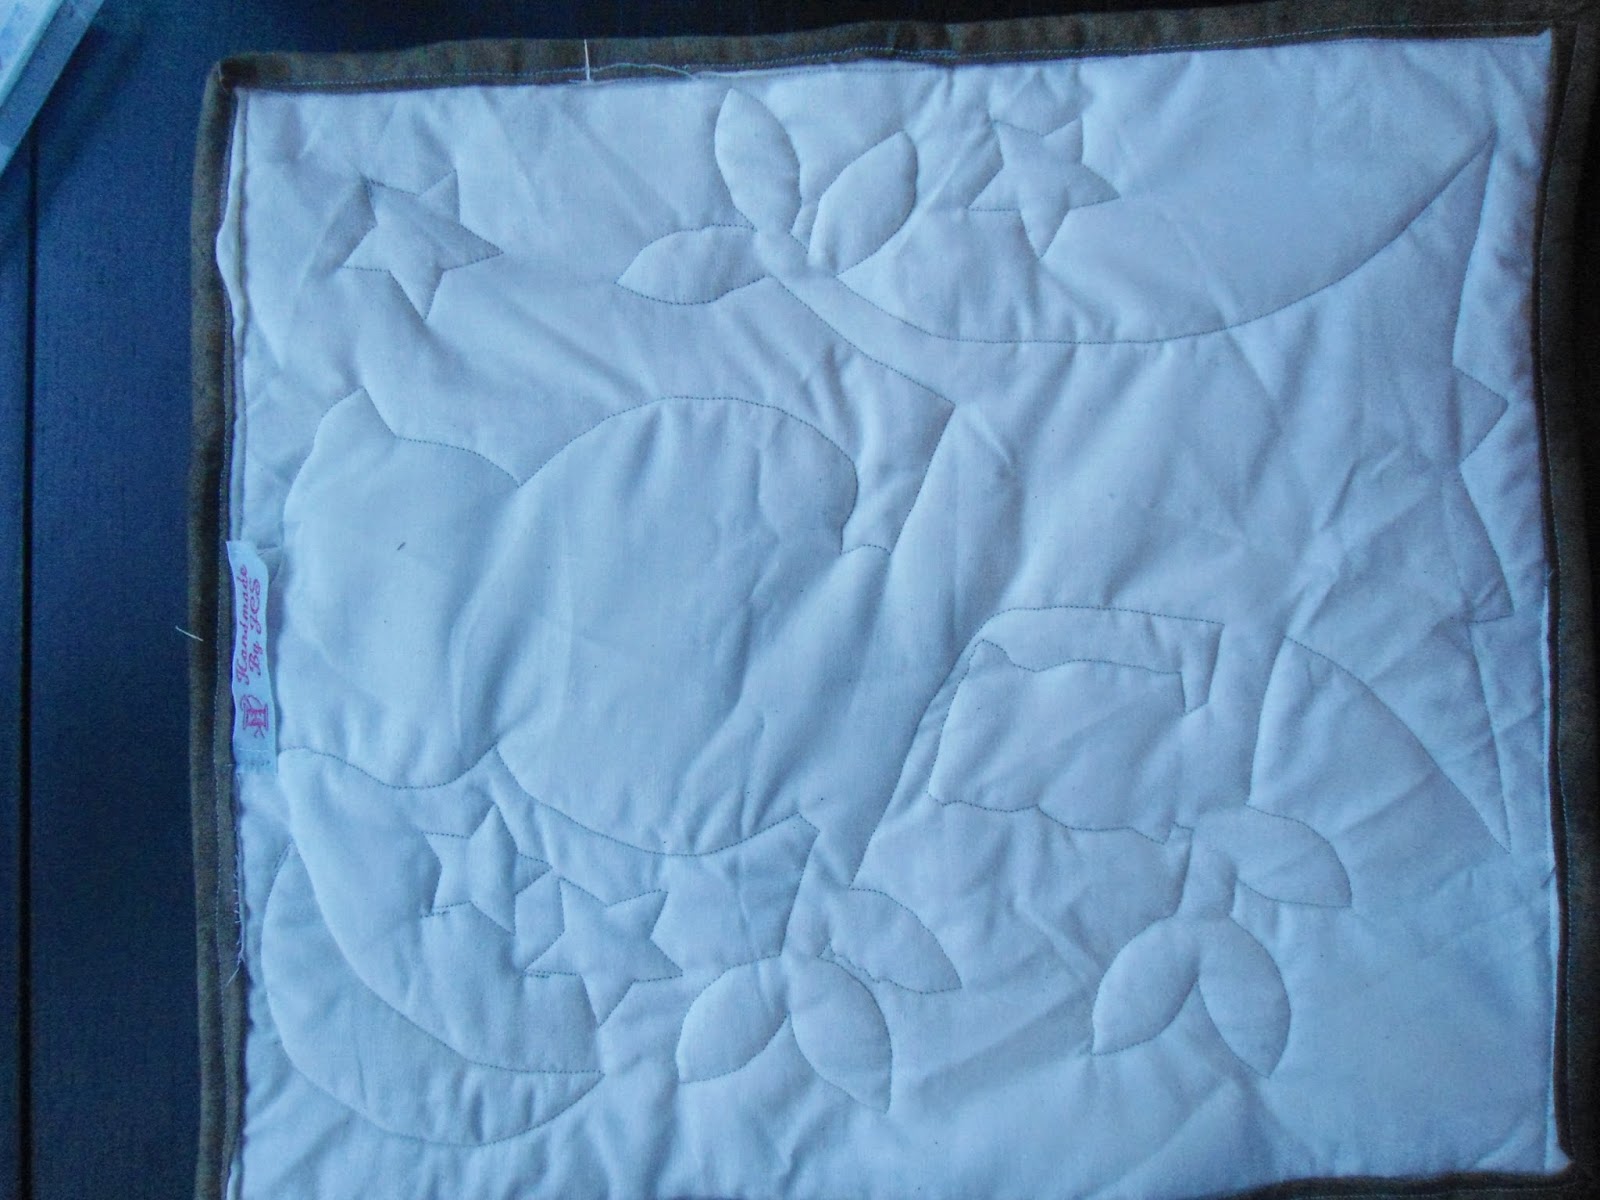
In terms of quilting, I quilted along the edges of the owls, tree, leaves, stars and along the edges of the brown border. It definitely made the owls 'pop' and I'm really happy with how the whole project turned out.
One of the more tricky aspects was keeping everything straight and not glueing everything together to keep the little pieces in the right place.
Now I have tried this technique I'm really looking forward to trying it again! Does anyone have any suggestions for some more beginnerish projects?
Take care and have a great weekend folks :-)
JCS x
So in light of the fact I've no real photos to share on my current WIP here's a little project that I worked on for a while last year. It had been one of these ones that was ongoing in the background while I made loads of other projects as I had a very liberal timescale for this. My friend's birthday was on November the 11th and she loves owls - so i thought that this would make a great present - plus I didn't have to send this one as I visited at the end of November. I also bought the kit around mid march so was in no hurry to get things done.
This project came as a kit with everything included including stencils and a small instruction sheet.
I found this a great starter project for applique as the felt doesn't fray and is very easy to work with. All the pieces were hand stitched together with a mid grey lightweight thread. I didn't reckon that this would see much wear and tear so didn't use an expensive thread. I also used grey for appliqueing everything and did not change colours between objects because as the owls were light anyway I didn't think it showed up much at all.
In terms of quilting, I quilted along the edges of the owls, tree, leaves, stars and along the edges of the brown border. It definitely made the owls 'pop' and I'm really happy with how the whole project turned out.
| I love how the back turned out - all the images are so clear :-) |
One of the more tricky aspects was keeping everything straight and not glueing everything together to keep the little pieces in the right place.
Now I have tried this technique I'm really looking forward to trying it again! Does anyone have any suggestions for some more beginnerish projects?
Take care and have a great weekend folks :-)
JCS x
Location:
Home
Tuesday, 24 February 2015
Completed: By Hand London Anna Dress
Back in April last year I backed By Hand London's kickstarter campaign and the other weekend while I felt really ill with my kidney infection I got the best delivery ever: a box full of patterns pins and fabric! This lifted my mood no end as I have been itching to try some of their patterns since last year when I backed them!
Before I got the delivery I had in my mind that I wanted to try the Elizalex dress first, however on a complete whim I picked the Anna pattern out of the box and traced it all out.
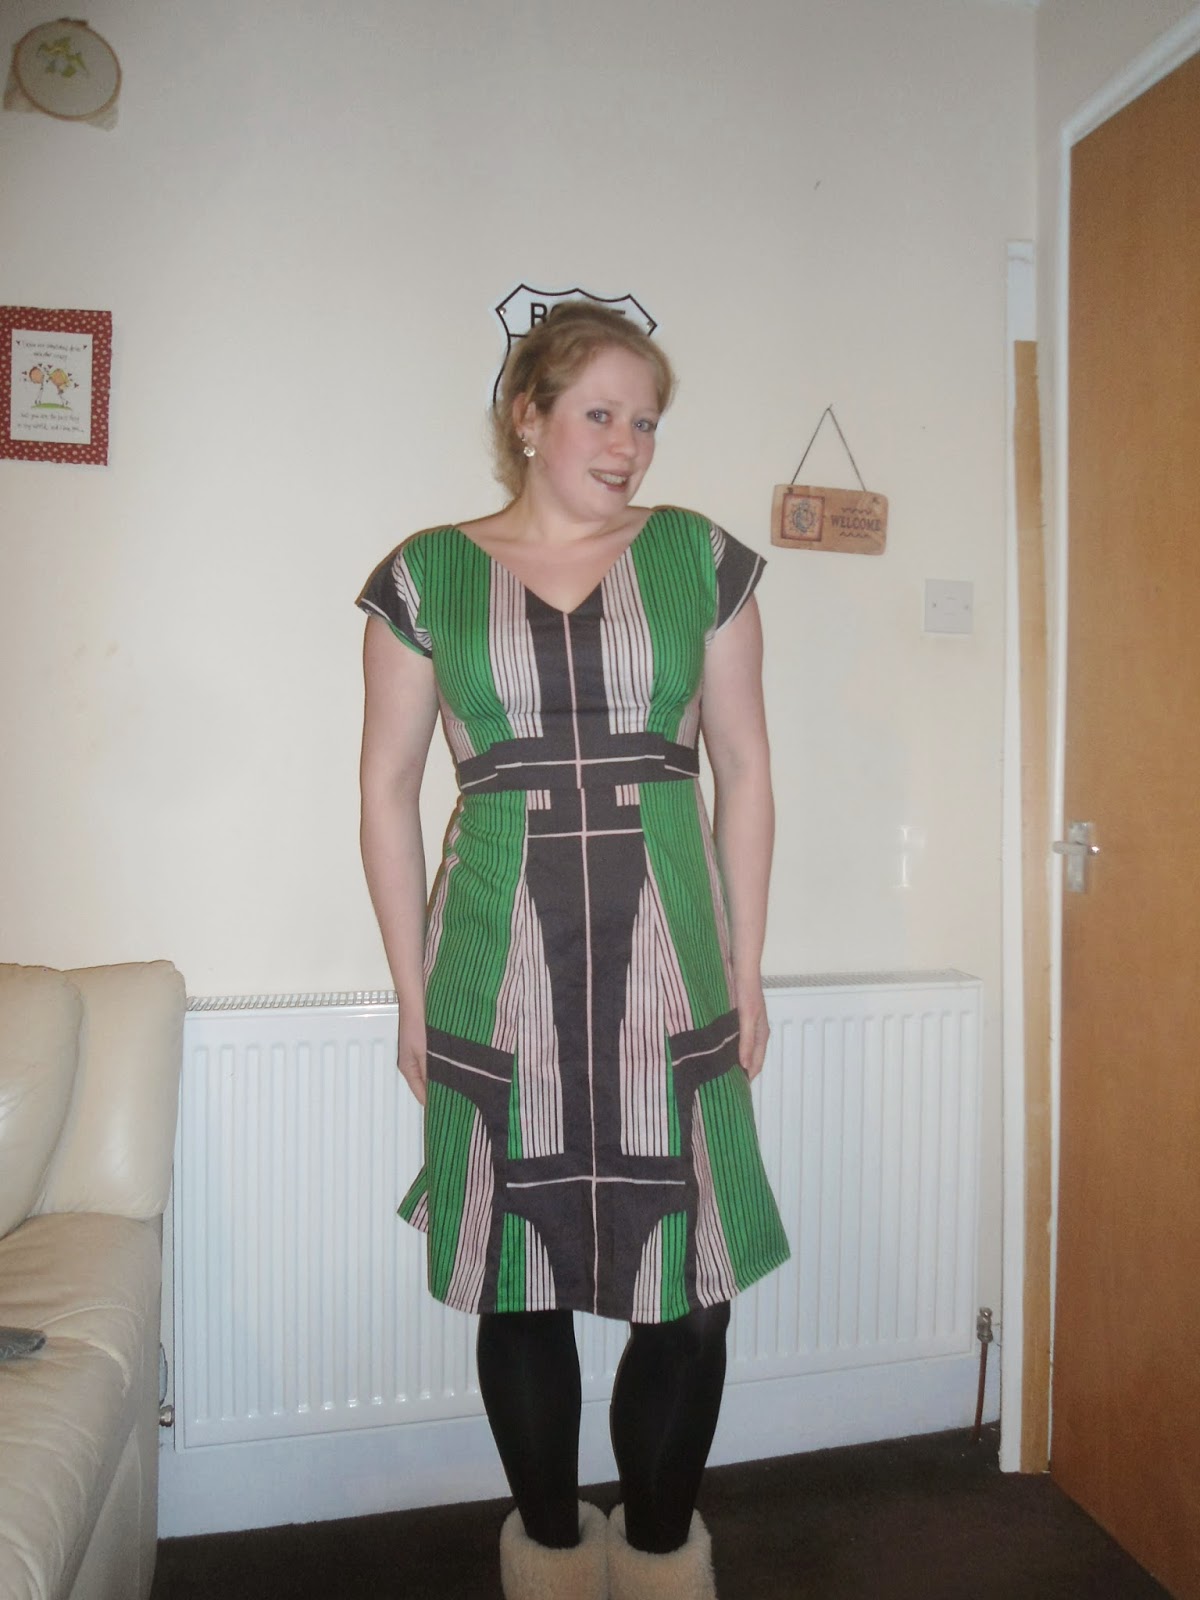
Lets talk about the fabric. I picked up this 3 m length of lightweight cotton from a recent trip to Ikea for the pricely sum of £10. The pink parts of the pattern were white before the prewash however a red top somehow made it into the same wash cycle...
Due to my measurements I sit just above the finished sizes for a UK 14/ US 10 -so because this is the size I cut for my Kim muslin (and intended on using 1/2 inch seams however managed to use the full 5/8 seam) this is the size that I cut here too. I notionally glanced through the sewalong for the dress and spied that there was a lined version of the dress. I'm not hugely keen on facings so opted for the V-necked lined version of the dress.
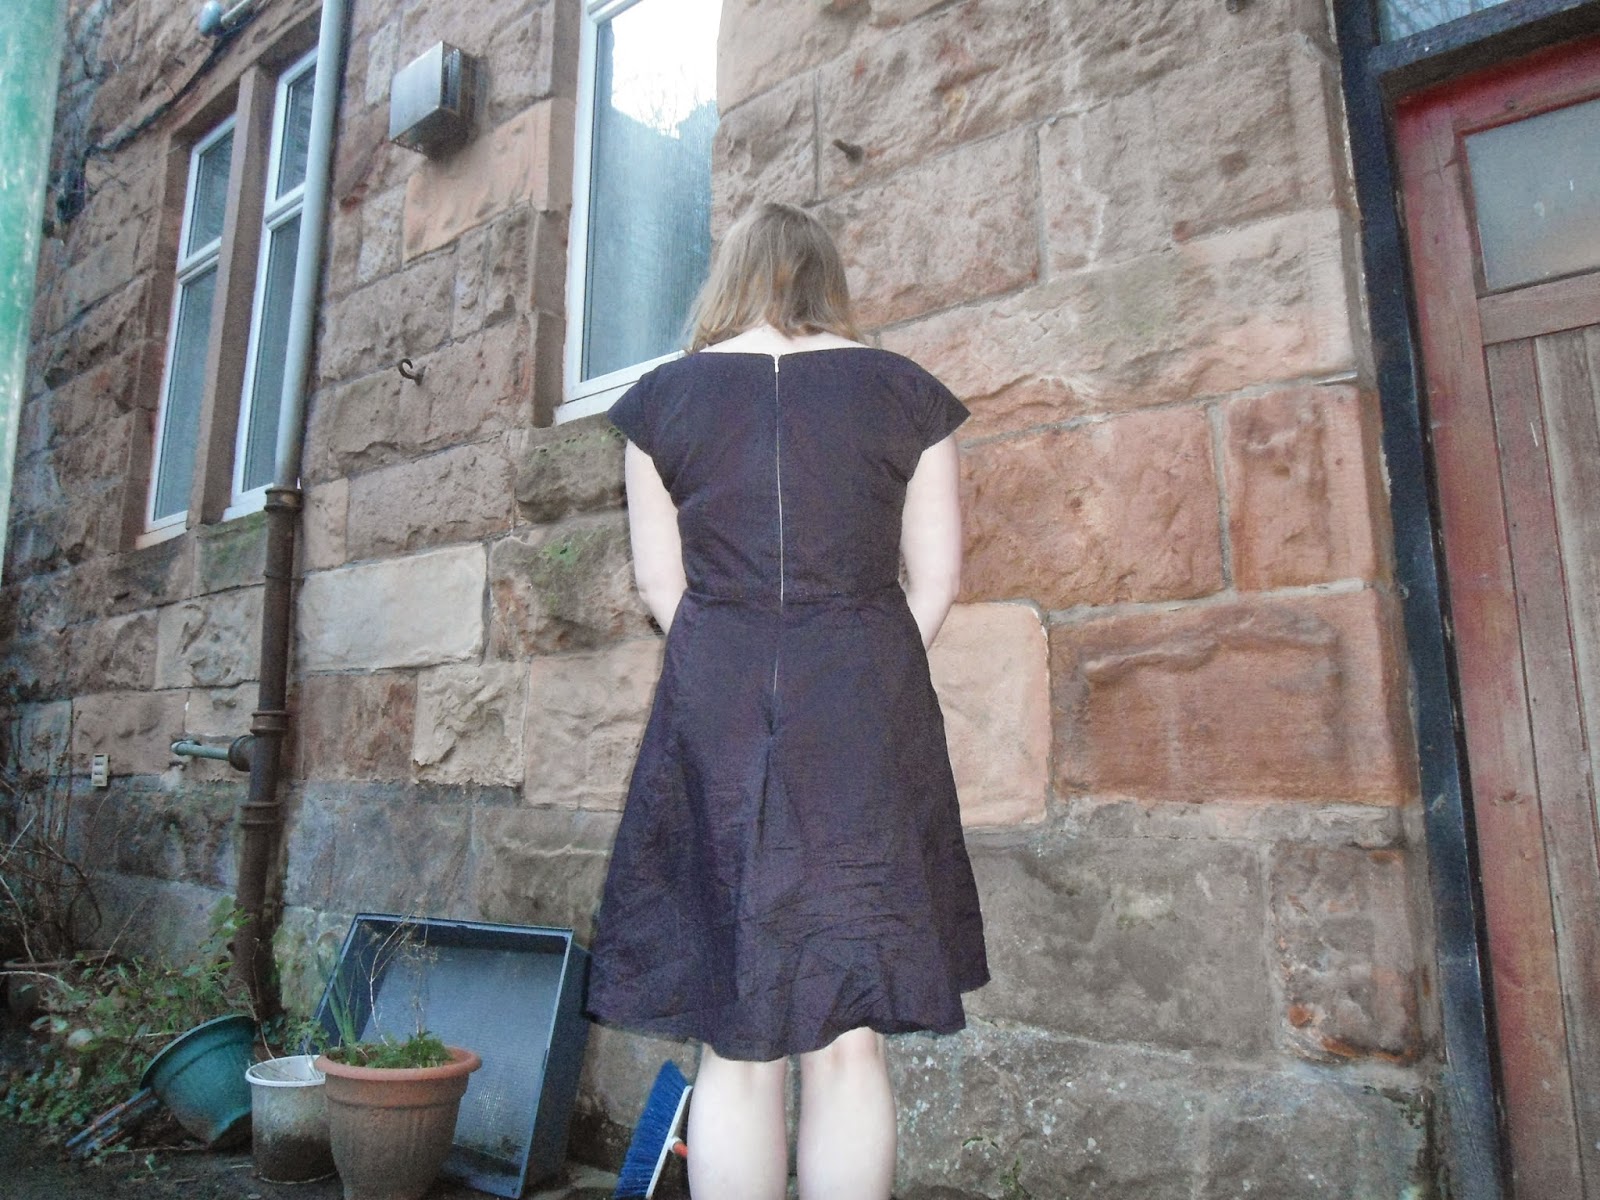
In a bold move, I inserted the zip without really checking if i would require to take the neckline in, however as it is an alteration I make on every garment I brass necked it and took the back neck in by 1.5 inches on either side and the results were perfect!
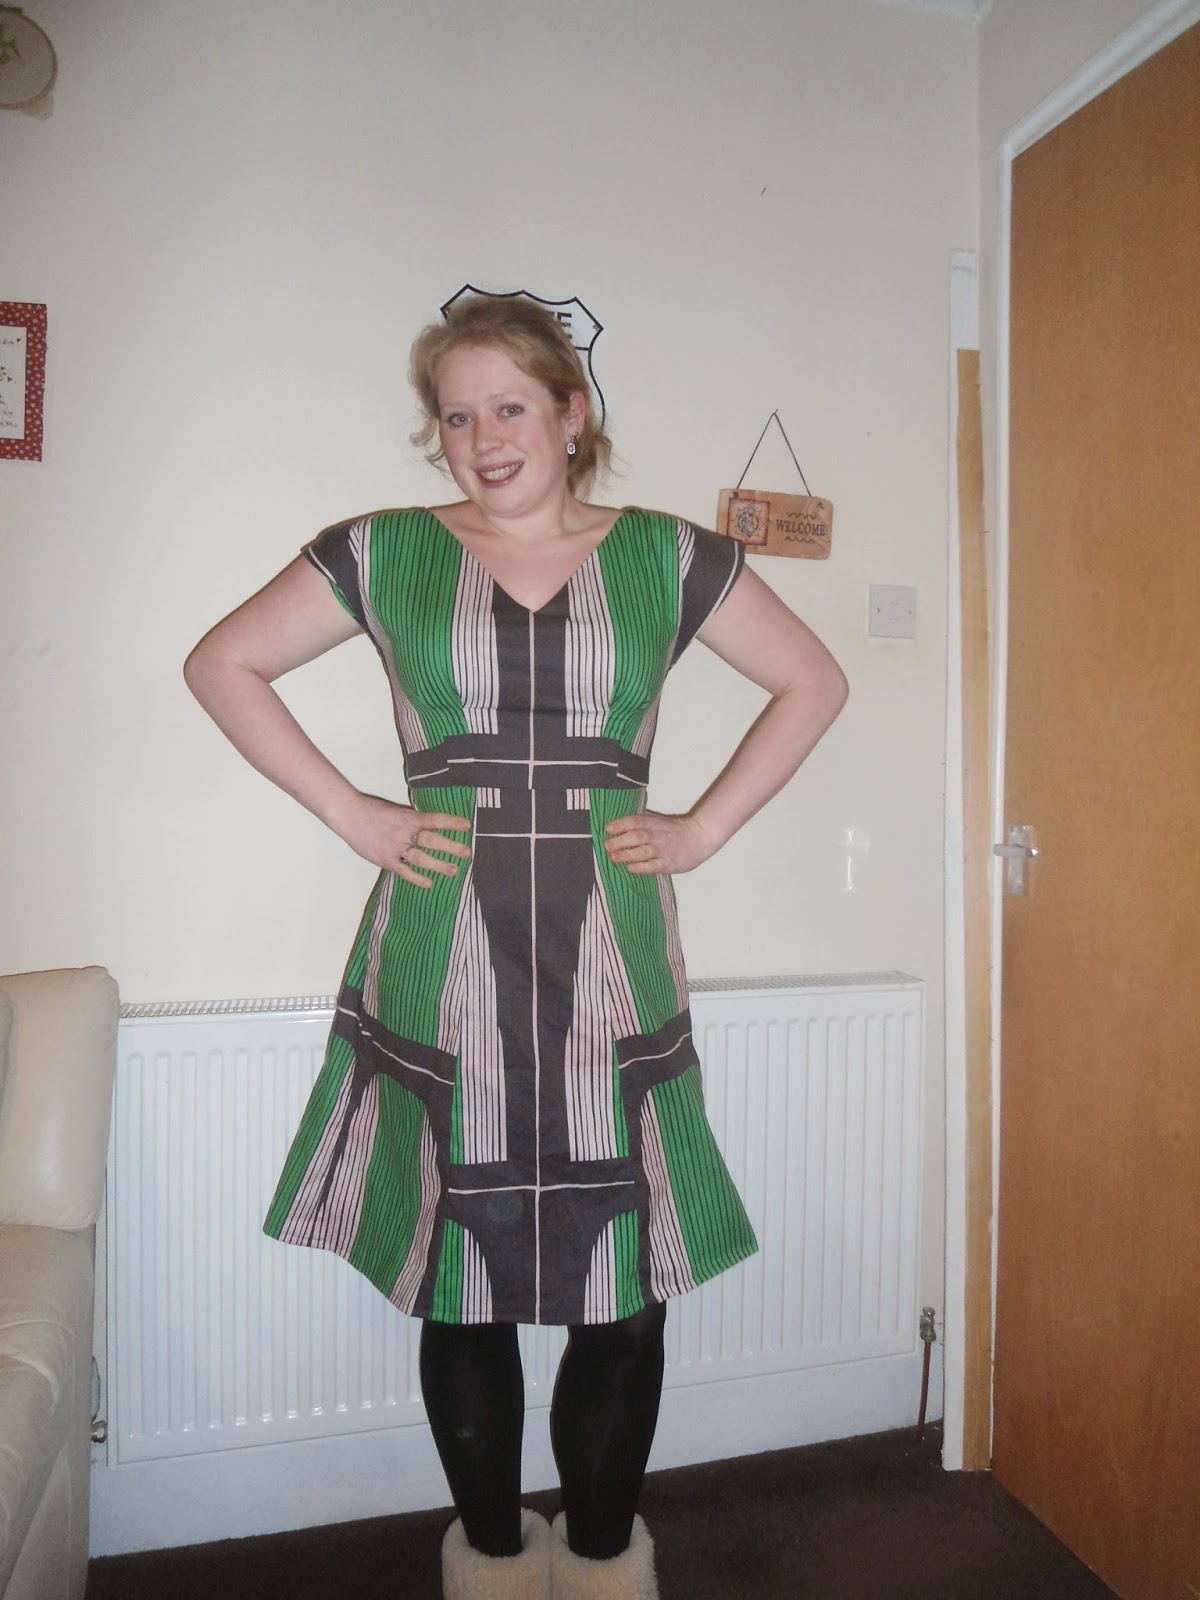
I really must admit. I get the hype. Before I was a little skeptical over the BHL Anna and weather I actually liked it but this dress is so flattering and the fit is so good straight off the pattern sheets. This dress was initially only going to be a muslin however it initially fit so well I couldn't see it go to waste and there marks the start of the Dylon drama!
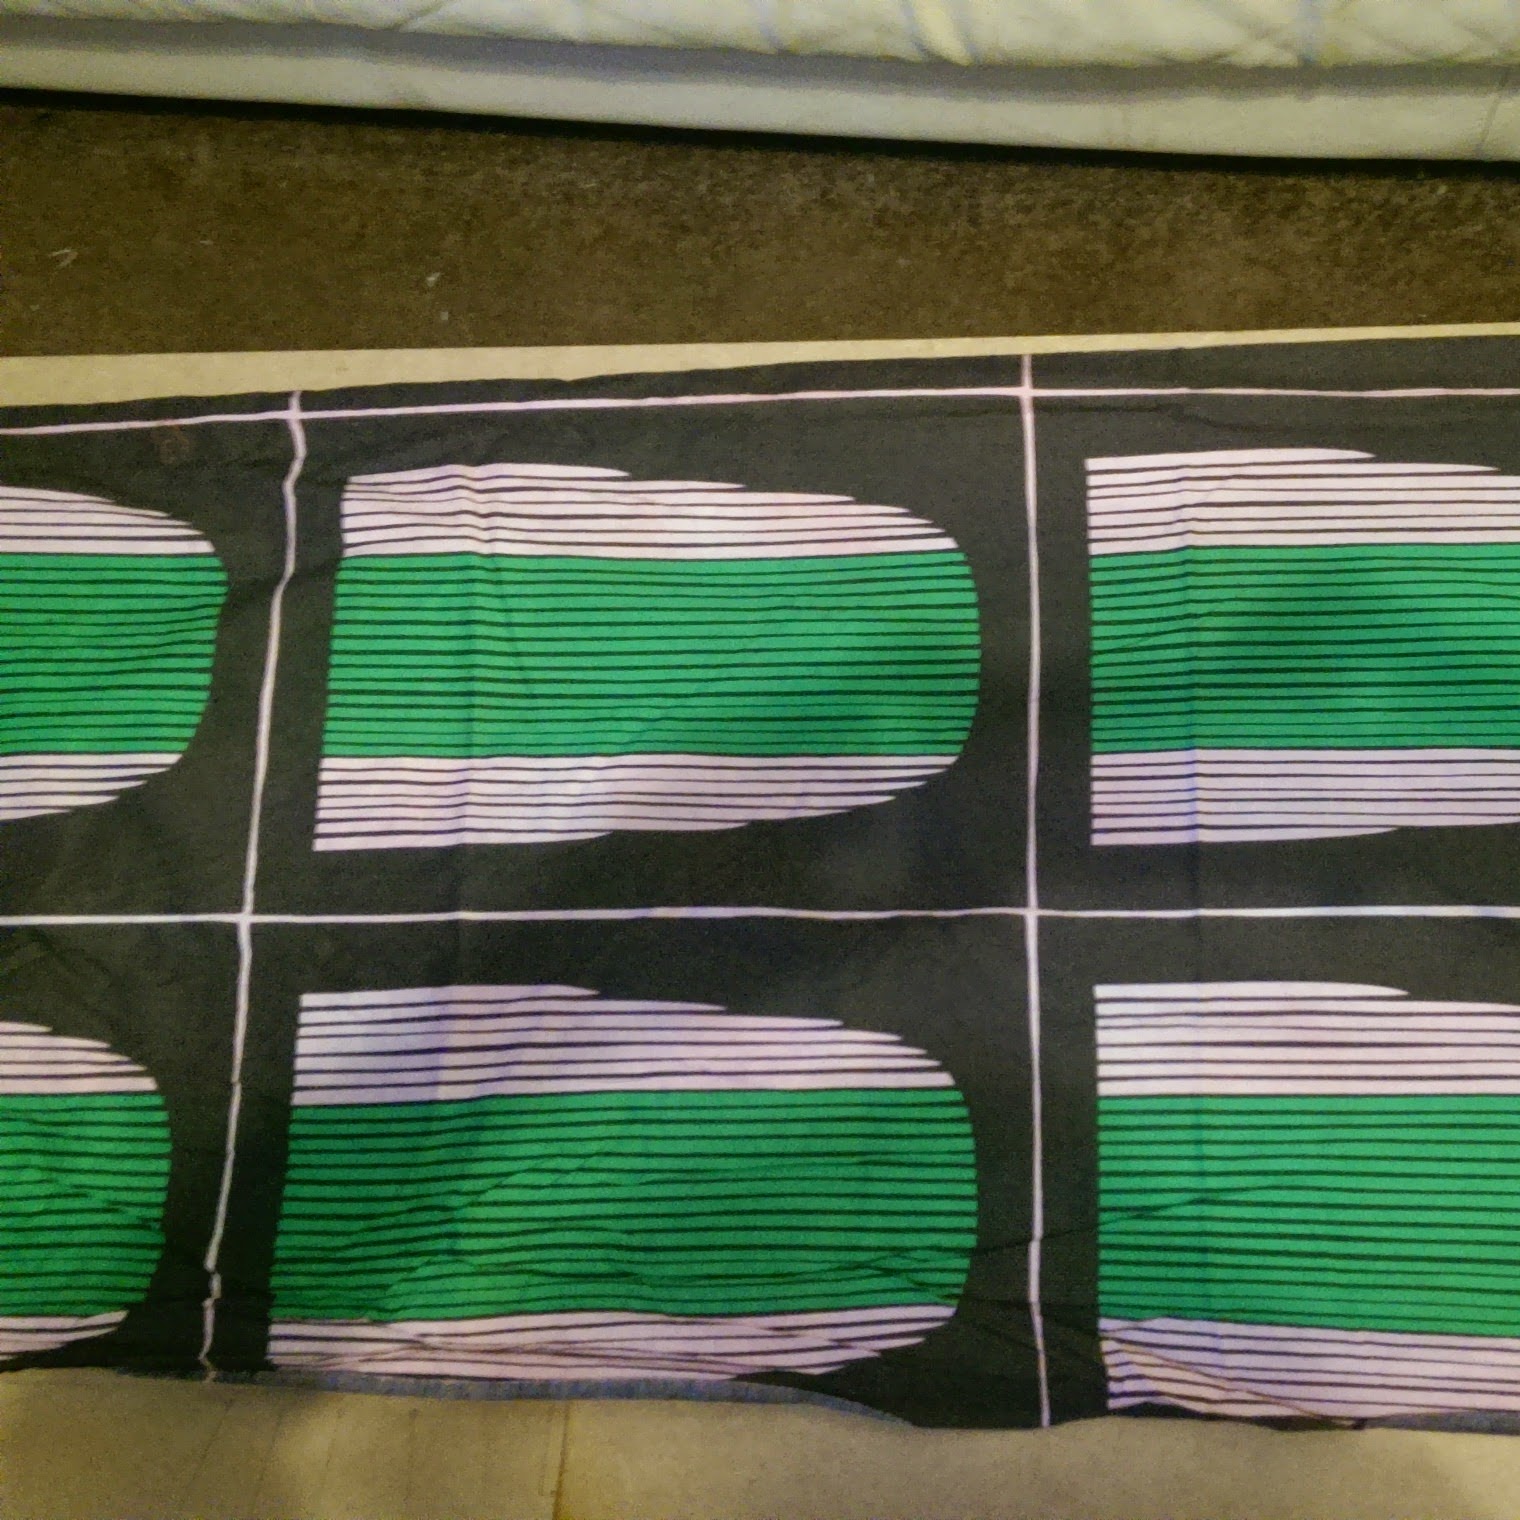
I had a right headache with this fabric and where to place the print, I'm not 100 % sold on the print either. One of the main problems was that lining up wrong on the CF skirt would have left me with a sporran.... I tried a few different placements with the different pattern pieces as I didn't have enough of it to properly match the print. In fact in the end I loved the print so much I went and bought Dylon.
Print hell this was! The placement and just the overall pattern of the fabric looked plain bad.
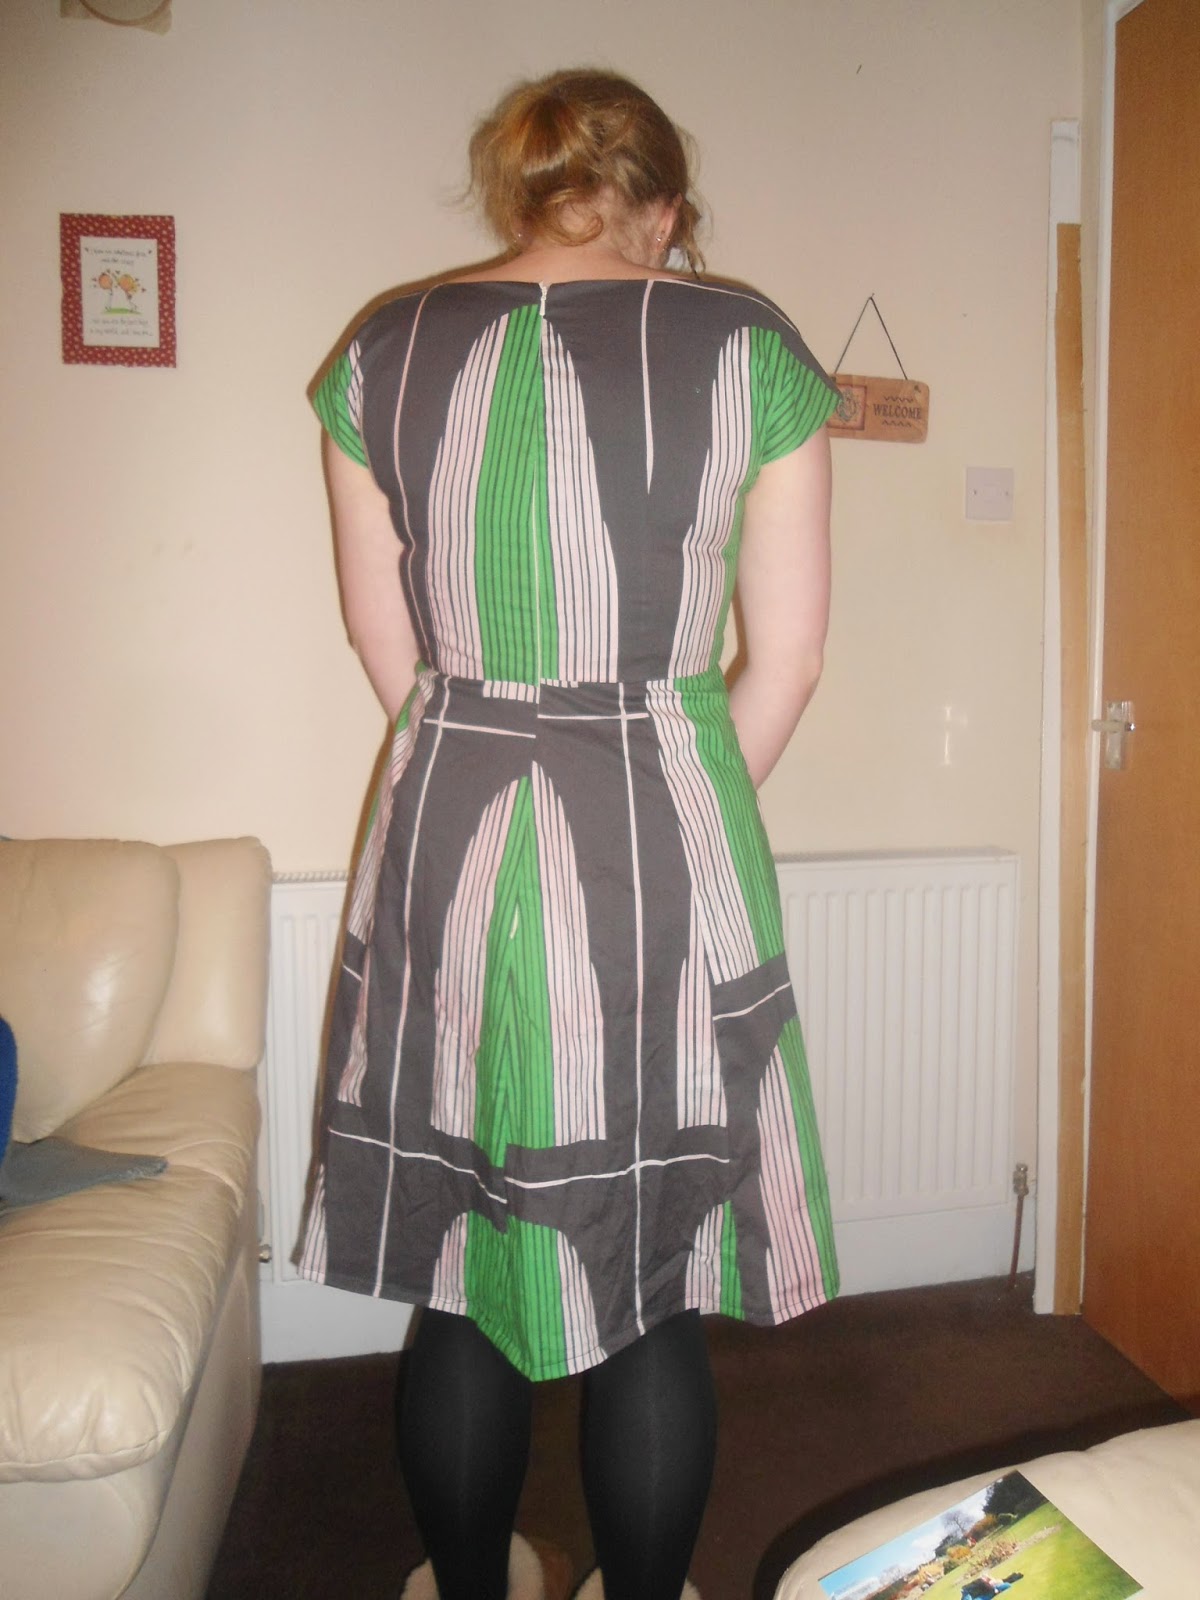
I realised that because it was a big print with multiple colours that the dye may not take well so tried bleaching it. After two rounds of bleaching the colour of the dress was no different apart from a few faded patches and I had read that bleaching destroys the fibres of the fabric :-(.
However 2 dyes later I have a wearable dress! I finished a little early today so I tried to get some photos in what was left of the light...
I must admit there are a few thngs I would tweak on this dress however nothing ~major. If I make this dress up again I definately will have to take some length out of the skirt - I cut out about an inch after I tried it on and even then took a huge hem. In addition I think i will also take an inch out of the waist - i prefer a slightly more snug fit. The final alteration I will make is to omit the sporran print fabric. I much prefer the black...
Has anyone else made up the Anna with the lining? I really prefer linings over facings I think the finish is so much neater.
Have a good week folks :-)
Jen xx
Before I got the delivery I had in my mind that I wanted to try the Elizalex dress first, however on a complete whim I picked the Anna pattern out of the box and traced it all out.
Lets talk about the fabric. I picked up this 3 m length of lightweight cotton from a recent trip to Ikea for the pricely sum of £10. The pink parts of the pattern were white before the prewash however a red top somehow made it into the same wash cycle...
![]() |
| Strange sporran esque print! |
Due to my measurements I sit just above the finished sizes for a UK 14/ US 10 -so because this is the size I cut for my Kim muslin (and intended on using 1/2 inch seams however managed to use the full 5/8 seam) this is the size that I cut here too. I notionally glanced through the sewalong for the dress and spied that there was a lined version of the dress. I'm not hugely keen on facings so opted for the V-necked lined version of the dress.
![]() |
| The pin showing where the zip lies. |
In a bold move, I inserted the zip without really checking if i would require to take the neckline in, however as it is an alteration I make on every garment I brass necked it and took the back neck in by 1.5 inches on either side and the results were perfect!
| If you can get past the print the fit is really great |
I had a right headache with this fabric and where to place the print, I'm not 100 % sold on the print either. One of the main problems was that lining up wrong on the CF skirt would have left me with a sporran.... I tried a few different placements with the different pattern pieces as I didn't have enough of it to properly match the print. In fact in the end I loved the print so much I went and bought Dylon.
Print hell this was! The placement and just the overall pattern of the fabric looked plain bad.
| No gapey nackline :-D |
I realised that because it was a big print with multiple colours that the dye may not take well so tried bleaching it. After two rounds of bleaching the colour of the dress was no different apart from a few faded patches and I had read that bleaching destroys the fibres of the fabric :-(.
However 2 dyes later I have a wearable dress! I finished a little early today so I tried to get some photos in what was left of the light...
| I only realised that this has been ongoing for so long when I saw the photos and had had an interim haircut... |
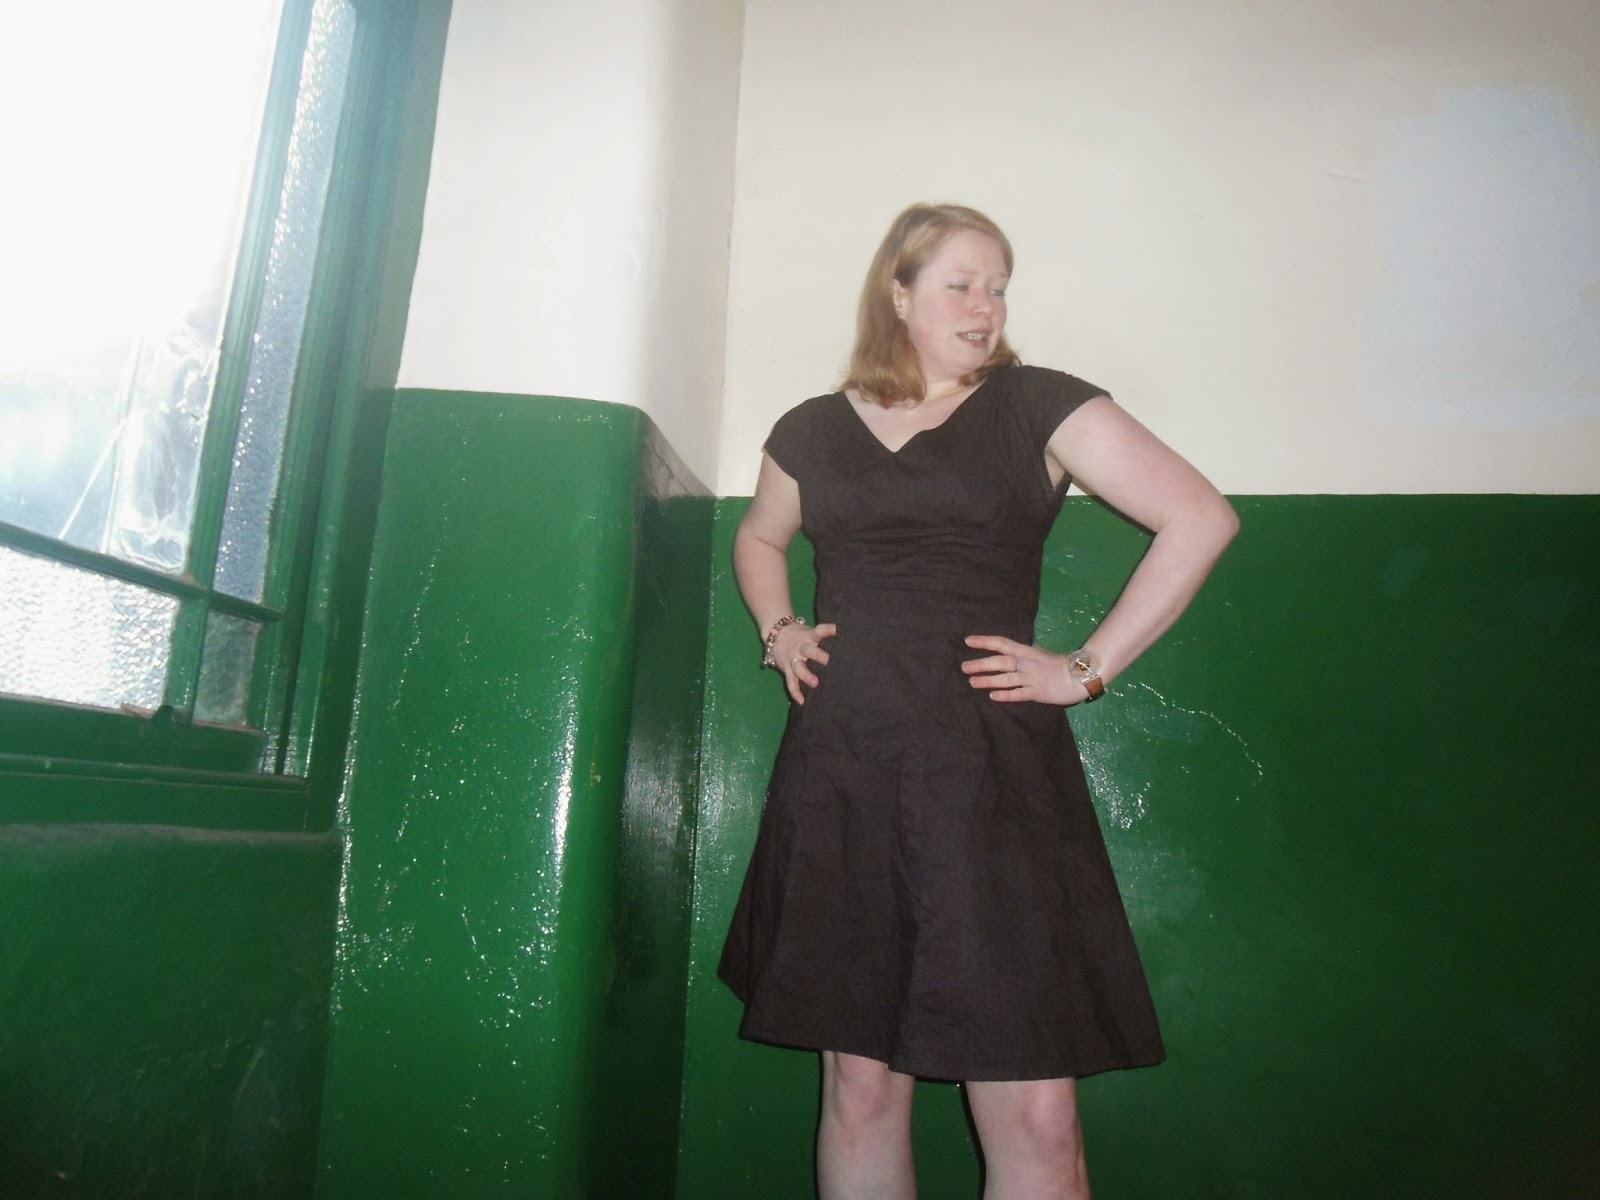
| An outtake - I think someone came in the close at this point! |
Has anyone else made up the Anna with the lining? I really prefer linings over facings I think the finish is so much neater.
Have a good week folks :-)
Jen xx
Labels:
2015,
2015 makes,
Anna Dress,
By Hand London,
dresses,
dressmaking,
sewing
Location:
Glasgow, Glasgow City, UK
Subscribe to:
Posts (Atom)